今回は、Google Colab を使って、学習済みモデルで Image Captioning をサクッとやってみます
こんにちは cedro です。
最近、Google Colab に PyTorch が標準で組み込まれるようになり、PyTorch の普及がさらに進んでいることを実感しています。
それから、Google Colab とGoogle Drive の連携が簡単になり、GPUが無料で使える環境が益々使いやすくなっているのが、嬉しいところ。
ところで、Image Captioning をご存知ですか。これは画像を入力すると、何がどんな風に写っているか説明する文章を生成するモデルです。
これは、いわゆる画像認識の中では、個人的に非常に興味深い分野です。
ということで、今回は、Google Colab を使って、学習済みモデルで Image Captioning をサクッとやってみます。
Image Captioning の原理

このモデルを簡単に言えば、CNNによって画像から抽出された特徴ベクトルを入力とした、LSTM文章生成モデルです。
以前このブログで LSTM文章生成モデルをご紹介しました。このモデルは小説を単語単位でベクトル化して、その並び順をLSTMで学習します。
学習後は、任意の単語(あるいはフレーズ)を入力すると、次の単語、さらにその次の単語と、繰り返し単語を予測することによって、学習した小説に似た文章を生成します。
Image Captioning は、このLSTM文章生成モデルへの単語ベクトル入力が、画像の特徴ベクトルに変わっただけです。
ちなみに、Image Captioning で使うデータセットは、画像とその内容を説明するテキストの対から出来ています。
コードを準備します
今回は、Githubにある yunjey/pytorch-tutorial のサンプルコードを使います。この後、Google Colab からGit Clone しますので、とりあえず、眺めてみるだけでOKです。
|
1 2 |
from google.colab import drive drive.mount('/content/drive') |
Google Colab に接続します。ファイル/python3 の新しいノートブックを開いたら上記コマンドをコピペして実行します。

実行するとこんな表示が出ます。リンクをクリックし、アカウントを選択したら、authorization code が表示されるので、これを四角内にコピぺすれば、Googole Driveがマウントされます。
|
1 2 3 4 5 6 |
cd drive/My Drive/ !git clone https://github.com/pdollar/coco.git cd coco/PythonAPI/ !make !python setup.py build !python setup.py install |
まず、coco_tools をセットアップします。上記コマンドを1行づつコピペして実行します。Google Colab はLinux コマンド ( makeとか ) が使えるので、便利ですね。
|
1 2 3 4 |
cd ../../ !git clone https://github.com/yunjey/pytorch-tutorial.git cd pytorch-tutorial/tutorials/03-advanced/image_captioning/ !pip install -r requirements.txt |
次に、image_captioning のコードと必要なライブラリーをインストールします。上記コマンドを1行づつコピペして実行します。
通常だと、この後、データセットをダウンロードし、LSTMを長時間掛けて学習させる訳ですが、このサンプルコードには学習済みモデルがあるので、今回はその手順を省き、サクッと学習済みモデルを使うことにします。
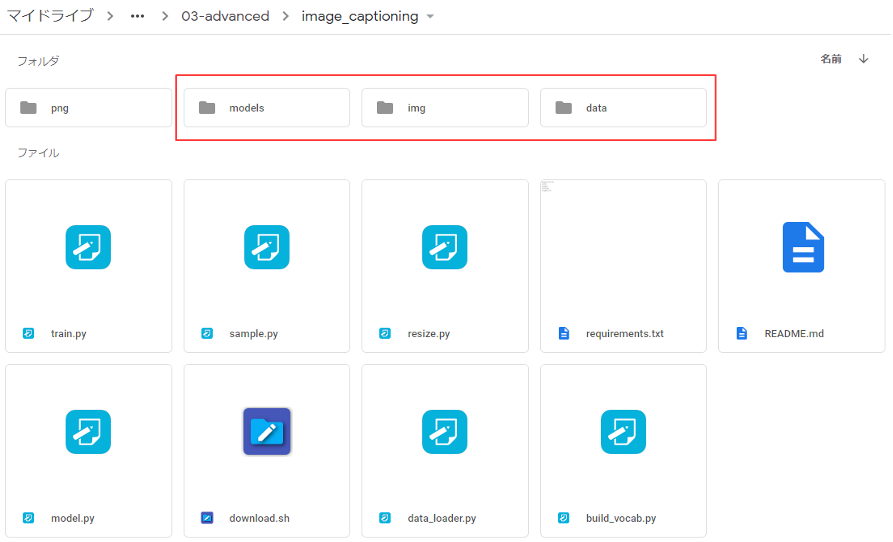
Google Driveに接続し、pytorch-tutorial/tutorials/03-advanced/image_captioning に移動し、models フォルダー、img フォルダー、 data フォルダーを作成します。
まず、pretrained model をダウンロード・解凍し、下記の様に2つのファイル名を変更して、models フォルダーの中に格納します。
- encoder-5-3000.pkl → encoder-2-1000.ckpt
- decoder-5-3000.pkl → decoder-2-1000.ckpt
ファイル名を変更する理由は、sample.pyのコードで指定しているファイル名とダウンロードしたファイル名が合っていないためです。コードを修正しても良いですが、ファイル名を変更する方が簡単なので、今回はファイル名を変更しています。
次に、vocabulary file をダウンロード・解凍し、data フォルダーに格納します。これで準備OKです。
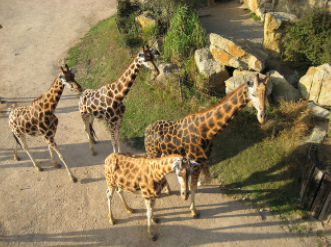
png フォルダーに入っている、このexample.png でテストしてみましょう。
|
1 |
!python sample.py --image=png/example.png |
上記コマンドをコピペして実行します。
<start> a group of giraffes standing next each other . <end> (キリンの群が隣同士に立っている) と表示されればOKです。
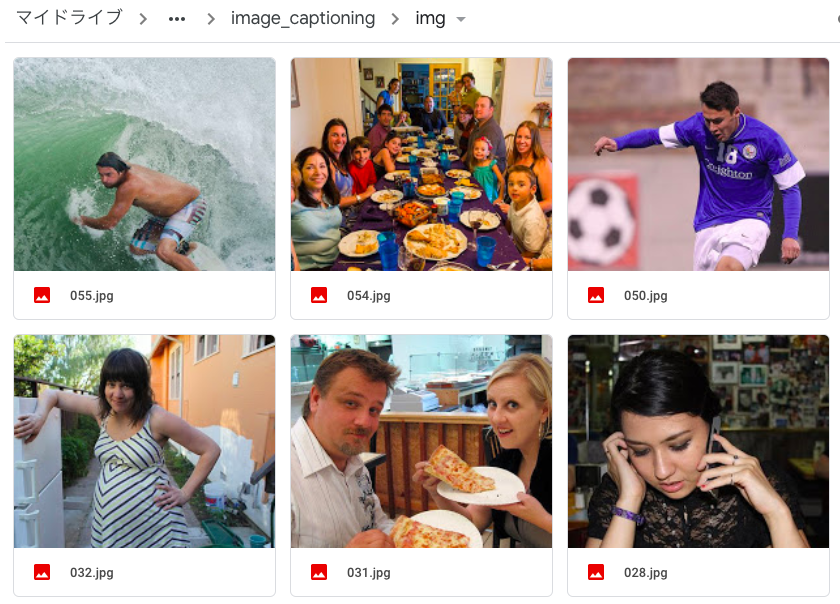
それでは、オリジナルの画像でやってみましょう。Image Captioning したい画像 (jpg) を先程作成した img フォルダーの中に格納します。
|
1 2 3 4 5 6 7 8 9 10 11 12 13 14 15 16 17 18 19 20 21 22 23 24 25 26 27 28 29 30 31 32 33 34 35 36 37 38 39 40 41 42 43 44 45 46 47 48 49 50 51 52 53 54 55 56 57 58 59 60 61 62 63 64 65 66 67 68 69 70 71 72 73 74 75 76 77 78 79 80 81 82 83 |
import torch import matplotlib.pyplot as plt import numpy as np import argparse import pickle import os from torchvision import transforms from build_vocab import Vocabulary from model import EncoderCNN, DecoderRNN from PIL import Image # Device configuration device = torch.device('cuda' if torch.cuda.is_available() else 'cpu') def load_image(image_path, transform=None): image = Image.open(image_path) image = image.resize([224, 224], Image.LANCZOS) if transform is not None: image = transform(image).unsqueeze(0) return image def main(): # Image preprocessing transform = transforms.Compose([ transforms.ToTensor(), transforms.Normalize((0.485, 0.456, 0.406), (0.229, 0.224, 0.225))]) # Load vocabulary wrapper with open(vocab_path, 'rb') as f: vocab = pickle.load(f) # Build models encoder = EncoderCNN(embed_size).eval() # eval mode (batchnorm uses moving mean/variance) decoder = DecoderRNN(embed_size, hidden_size, len(vocab), num_layers) encoder = encoder.to(device) decoder = decoder.to(device) # Load the trained model parameters encoder.load_state_dict(torch.load(encoder_path)) decoder.load_state_dict(torch.load(decoder_path)) # Prepare an image image = load_image(image_path, transform) image_tensor = image.to(device) # Generate an caption from the image feature = encoder(image_tensor) sampled_ids = decoder.sample(feature) sampled_ids = sampled_ids[0].cpu().numpy() # (1, max_seq_length) -> (max_seq_length) # Convert word_ids to words sampled_caption = [] for word_id in sampled_ids: word = vocab.idx2word[word_id] sampled_caption.append(word) if word == '<end>': break sentence = ' '.join(sampled_caption) # Print out the image and the generated caption image = Image.open(image_path) plt.imshow(np.asarray(image)) plt.show() print (sentence) if __name__ == '__main__': encoder_path ='models/encoder-2-1000.ckpt' decoder_path ='models/decoder-2-1000.ckpt' vocab_path ='data/vocab.pkl' # Model parameters (should be same as paramters in train.py) embed_size=256 hidden_size=512 num_layers=1 import glob files = sorted(glob.glob('img/*.jpg')) for i, image_path in enumerate (files): main() |
img フォルダーの中にある画像 (jpg) をImage Captioning するコードです。このコードをコピペして実行します。
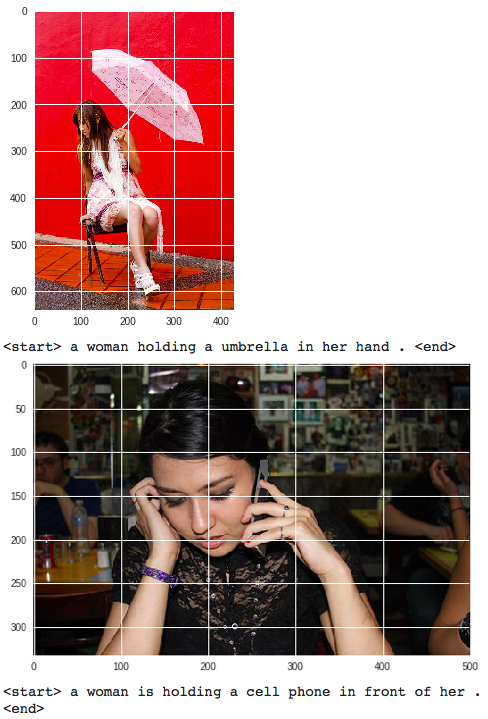
コードを実行するとこんな感じで、対象となる画像と説明文を連続してインラインに表示します。
実行結果の例を下記にまとめて記載します。なお、生成した文章が分かり易い様に、画像の下部に大き目に表示しています。
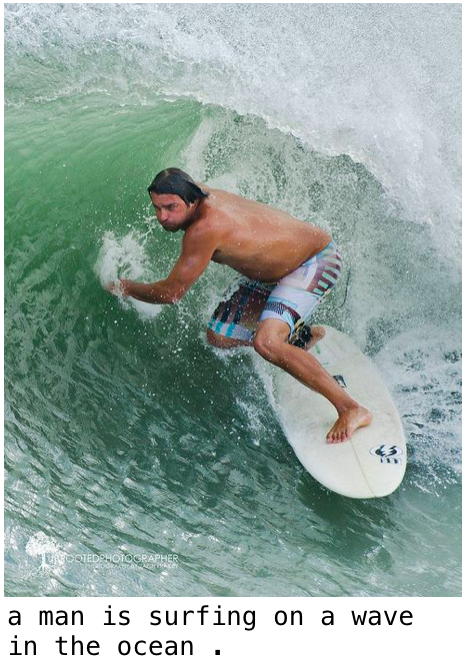
「海で男が波に乗ってサーフィンをしている。」正にその通りですね。
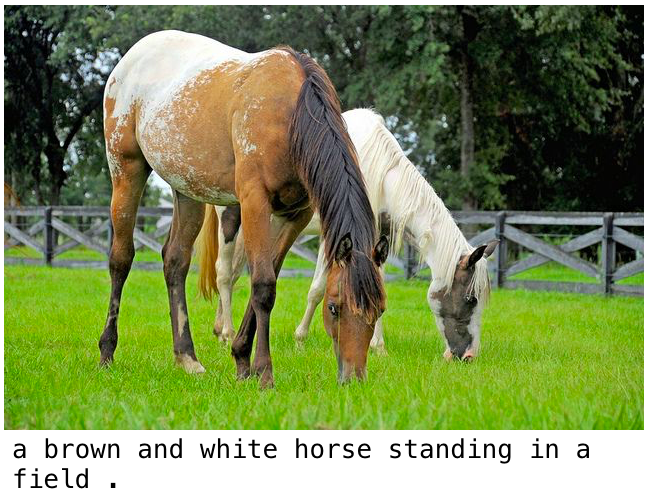
「茶色の馬と白い馬が草の上に立っている。」色もちゃんと認識しているようです。

「テーブルで男と女がピザを食べている。」テーブル、男女、ピザを認識しています。
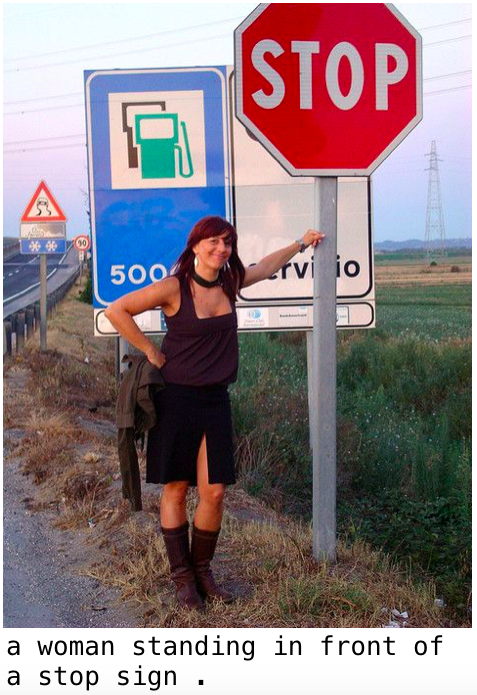
「女性が止まれ標識の前に立っている。」女性と止まれ標識、そして位置関係を的確に表現していますね。
ただ、本音を言うと、特徴量の抽出をCNNでやっているので位置関係の判定は難しいと思います。類似のテキストのパターンを使っているのが、たまたま当たったのではないかと思いますが、これもありですよね(笑)。
では、また。





コメントを残す