1.はじめに
従来、StyleGANベースで顔動画のアニメ化をしようとすると、顔の位置合わせや顔以外の詳細部分の欠落などの問題がありました。今回ご紹介するVToonifyは、これらの問題を解消する技術です。
*この論文は、2022.9に提出されました。
2.VToonifyとは?
下記が VToonify のアーキテクチャーで、DualStyleGANを変形させたものと考えることが出来ます。
DualStyleGANは、定数を入力として低解像度レイヤから高解像度レイヤへと順次アップサンプリングするジェネレータを使います。そこへ、コンテンツとスタイルの潜在変数を入力して生成画像をコントロールします。このとき、低解像度レイヤは基本構造に影響し、高解像度レイヤは詳細部分に影響します。
一方、VToonifyは、画像(W×H)をダウンサンプリングしたものを入力として高解像度レイヤ以降をアップサンプリングするジェネレータ(G)を使います。そして、エンコーダ(E)のダウンサンプリング部分とジェネレータ(G)のアップサンプリング部分をUネット構造で接続(multi-scale content condition)することによって、入力画像の顔の位置合わせを不要にしています。
つまり、コンテンツの潜在変数を「画像のダウンサンプリング+multi-scale content conditio」 に置き換えた形と言うことが出来ます。 そして、ジェネレータ(G)のアップサンプリングをさらに2段階掛けること(2W×2H, 4W×4H)によって詳細部分の欠落を防止しています。

3.コード
コードはGoogle Colabで動かす形にしてGithubに上げてありますので、それに沿って説明して行きます。自分で動かしてみたい方は、この「リンク」をクリックし表示されたノートブックの先頭にある「Open in Colab」ボタンをクリックすると動かせます。
まず、セットアップを行います。ランタイム「psp_env」は認識されていません。という表示が出ることがありますが、無視して頂ければOKです。この、セットアップは最初に1回実行すればOKです。
|
1 2 3 4 5 6 7 8 9 10 11 12 13 14 15 16 17 18 19 20 21 22 23 24 25 26 27 28 29 30 31 32 33 34 35 36 37 38 39 40 41 42 43 44 45 46 47 48 49 50 51 52 53 54 55 56 57 58 59 60 61 62 63 64 65 66 67 68 69 70 |
#@title **セットアップ** import os os.environ['CUDA_VISIBLE_DEVICES'] = "0" #os.chdir('../') CODE_DIR = 'VToonify' device = 'cuda' !git clone https://github.com/cedro3/VToonify.git $CODE_DIR !wget https://github.com/ninja-build/ninja/releases/download/v1.8.2/ninja-linux.zip !sudo unzip ninja-linux.zip -d /usr/local/bin/ !sudo update-alternatives --install /usr/bin/ninja ninja /usr/local/bin/ninja 1 --force !pip install wget os.chdir(f'./{CODE_DIR}') MODEL_DIR = os.path.join(os.path.dirname(os.getcwd()), CODE_DIR, 'checkpoint') DATA_DIR = os.path.join(os.path.dirname(os.getcwd()), CODE_DIR, 'data') OUT_DIR = os.path.join(os.path.dirname(os.getcwd()), CODE_DIR, 'output') %load_ext autoreload %autoreload 2 import sys sys.path.append(".") sys.path.append("..") import argparse import numpy as np import cv2 import dlib import torch from torchvision import transforms import torchvision import torch.nn.functional as F from tqdm import tqdm import matplotlib.pyplot as plt from model.vtoonify import VToonify from model.bisenet.model import BiSeNet from model.encoder.align_all_parallel import align_face from util import save_image, load_image, visualize, load_psp_standalone, get_video_crop_parameter, tensor2cv2 MODEL_PATHS = { "encoder": {"id": "1NgI4mPkboYvYw3MWcdUaQhkr0OWgs9ej", "name": "encoder.pt"}, "faceparsing": {"id": "1jY0mTjVB8njDh6e0LP_2UxuRK3MnjoIR", "name": "faceparsing.pth"}, "arcane_exstyle": {"id": "1TC67wRJkdmNRZTqYMUEFkrhWRKKZW40c", "name": "exstyle_code.npy"}, "caricature_exstyle": {"id": "1xr9sx_WmRYJ4qHGTtdVQCSxSo4HP3-ip", "name": "exstyle_code.npy"}, "cartoon_exstyle": {"id": "1BuCeLk3ASZcoHlbfT28qNru4r5f-hErr", "name": "exstyle_code.npy"}, "pixar_exstyle": {"id": "1yTaKuSrL7I0i0RYEEK5XD6GI-y5iNUbj", "name": "exstyle_code.npy"}, "arcane000": {"id": "1pF4fJ8acmawMsjjXo4HXRIOXeZR8jLVh", "name": "generator.pt"}, "arcane077": {"id": "16rLTF2oC0ZeurnM6hjrfrc8BxtW8P8Qf", "name": "generator.pt"}, "caricature039": {"id": "1C1E4WEoDWzl0nAxR9okKffFmlMOENbeF", "name": "generator.pt"}, "caricature068": {"id": "1B1ko1x8fX2aJ4BYCL12AnknVAi3qQc8W", "name": "generator.pt"}, "cartoon026": {"id": "1YJYODh_vEyUrL0q02okjcicpJhdYY8An", "name": "generator.pt"}, "cartoon299": {"id": "101qMUMfcI2qDxEbfCBt5mOg2aSqdTaIt", "name": "generator.pt"}, "pixar052": {"id": "16j_l1x0DD0PjwO8YdplAk69sh3-v95rr", "name": "generator.pt"}, "cartoon": {"id": "11s0hwhZWTLacMAzZH4OU-o3Qkp54h30J", "name": "generator.pt"}, } # download all checkpoint import gdown gdown.download('https://drive.google.com/uc?id=1l8aqqZJMLnmQtkz8HPzakblq5G_zMZAr', 'v1.zip', quiet=False) ! unzip -d checkpoint v1.zip gdown.download('https://drive.google.com/uc?id=1hBcGhPmhZi01Jg6mvwD1yPyMVJgeiExX', 'v2.zip', quiet=False) ! unzip -d checkpoint v2.zip gdown.download('https://drive.google.com/uc?id=11aTPKbdnqjaljyzhMCVLz07Q3-74Bgsj', 'v3.zip', quiet=False) ! unzip -d checkpoint v3.zip %matplotlib inline from function import * ! mkdir download |
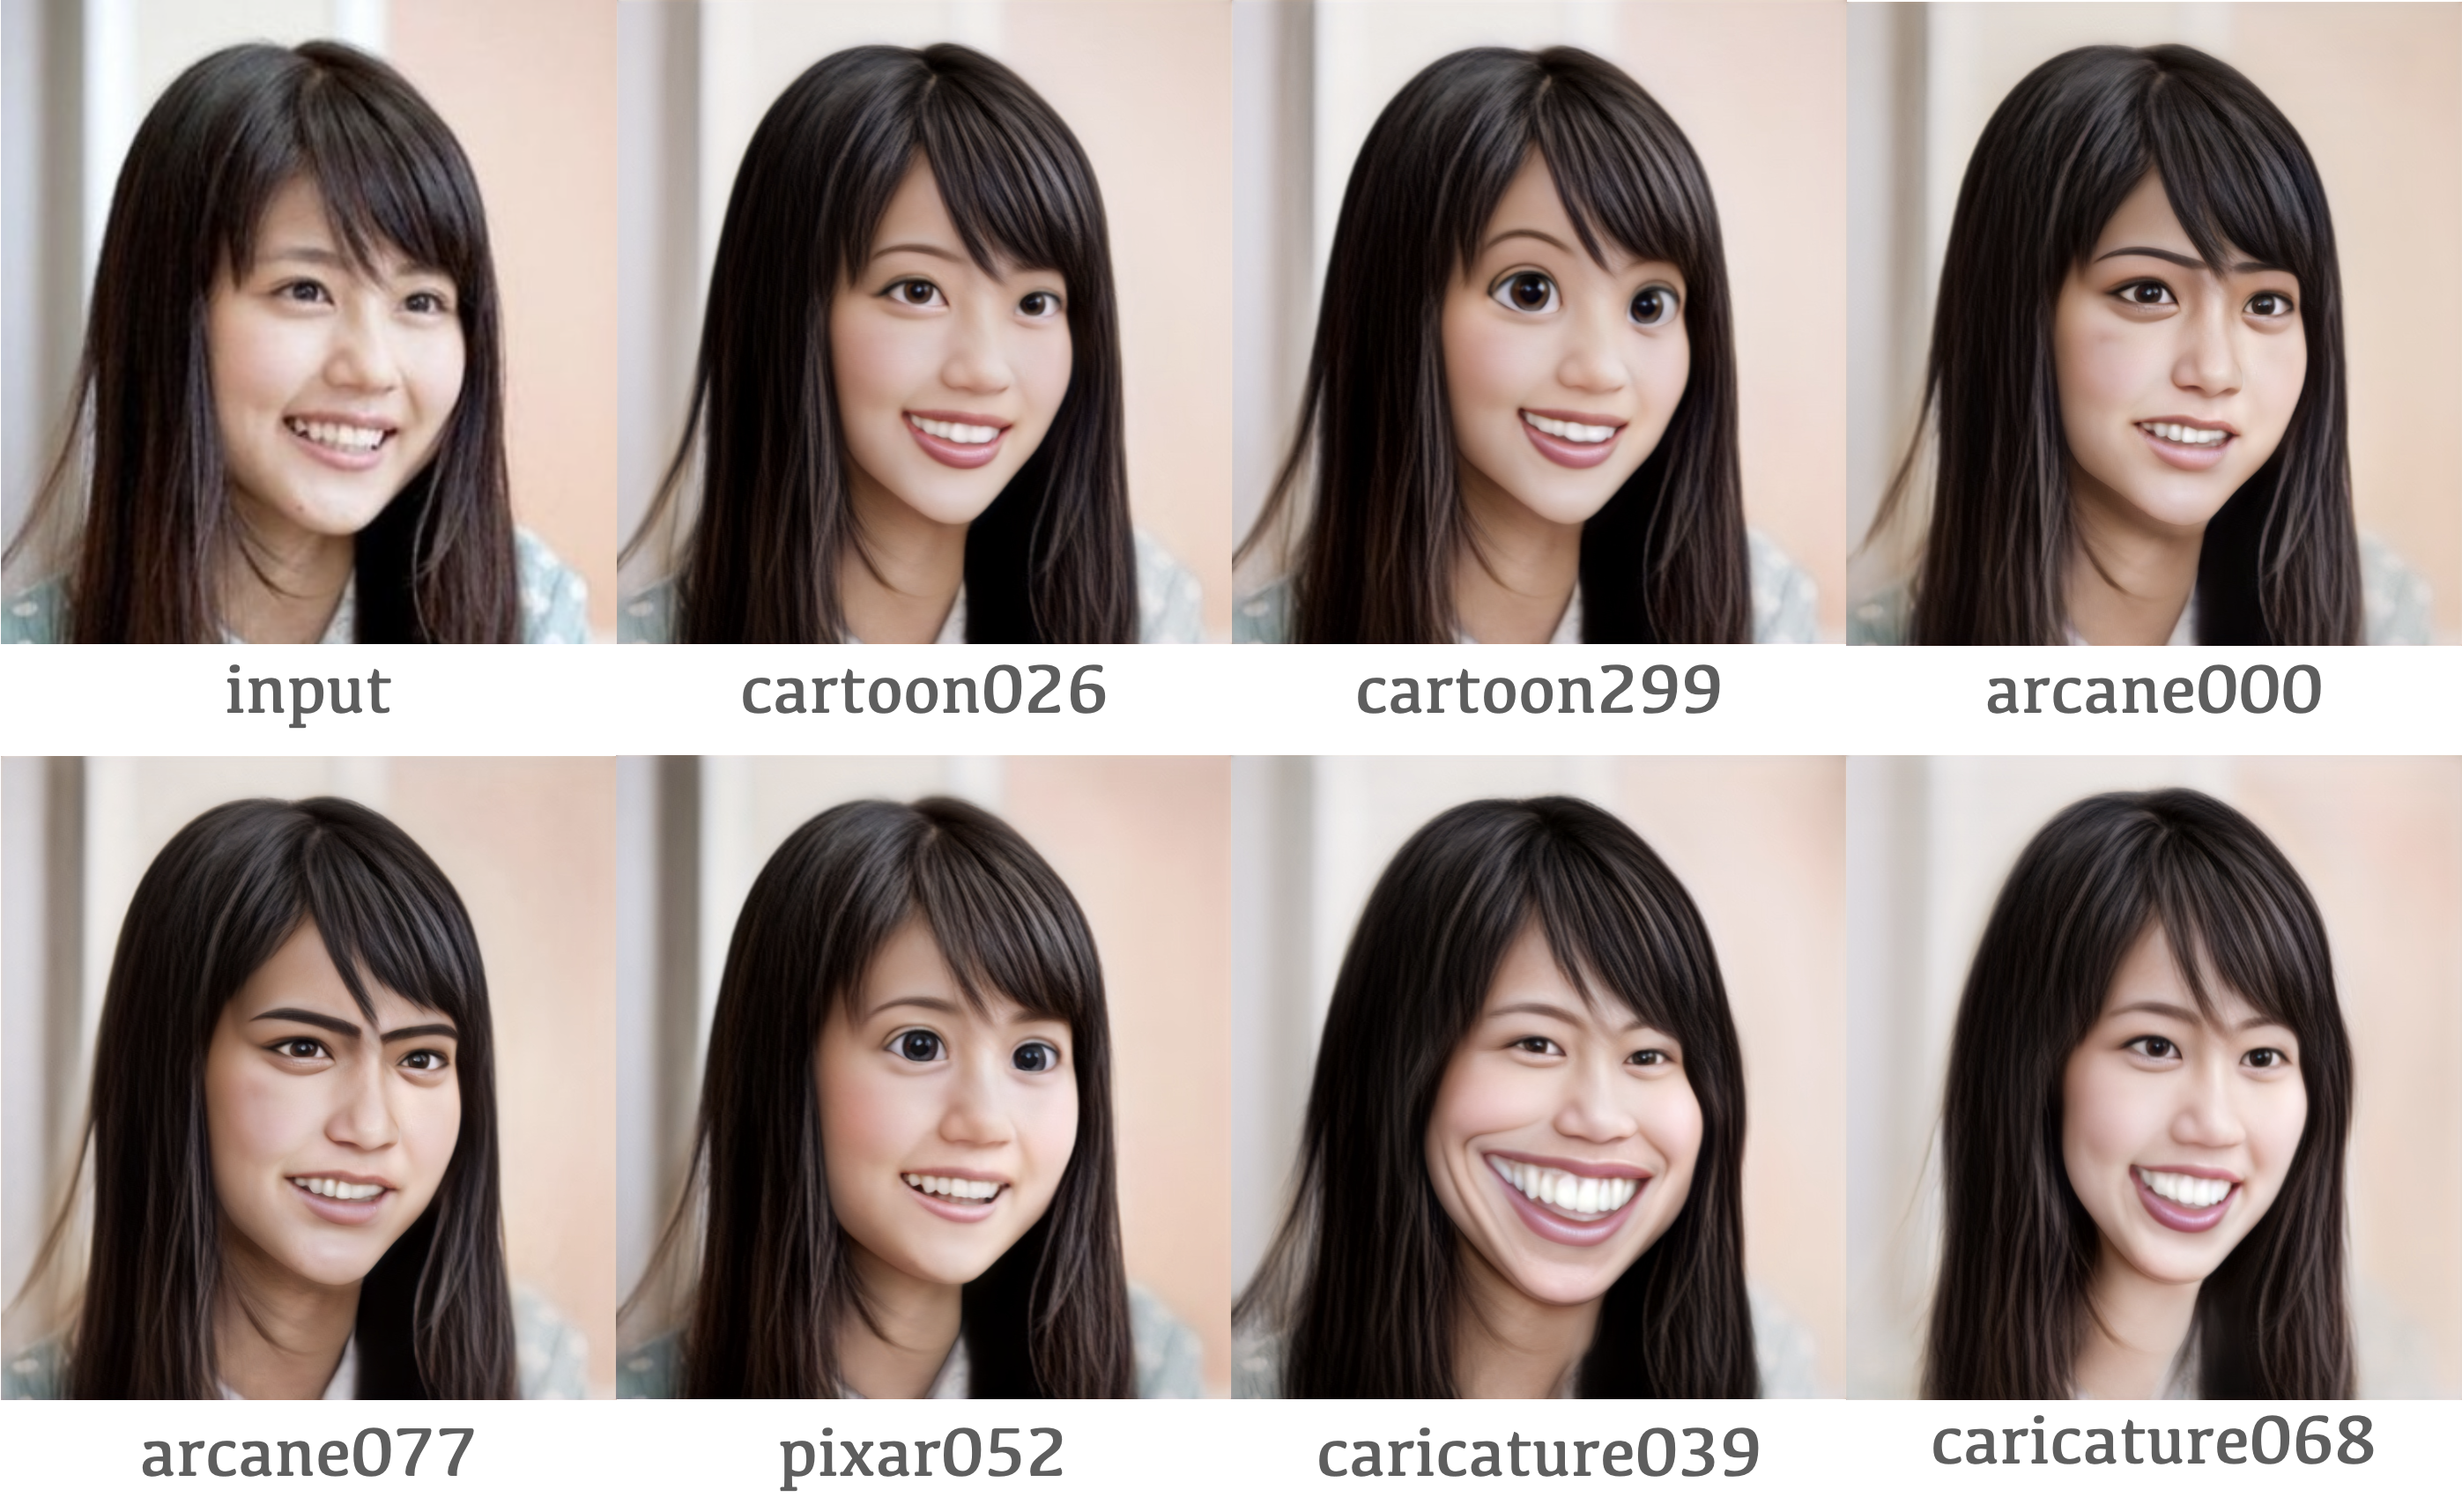
そして、モデルの選択を行います。style_typeで、cartoon026〜caricature068の7種類のモデルから1つを選択して実行します。このモデル選択は、モデルを変更する度に実行します。ここでは、cartoon026 を選択して実行します。
|
1 2 3 4 5 6 7 8 9 10 11 12 13 14 15 16 17 18 19 20 21 22 23 24 25 26 27 28 29 30 31 32 33 34 35 36 37 |
#@title **モデルの選択** style_type = "cartoon026" #@param ["cartoon026", "cartoon299", "arcane000", "arcane077", "pixar052", "caricature039", "caricature068", "comic000", "comic100"] transform = transforms.Compose([ transforms.ToTensor(), transforms.Normalize(mean=[0.5, 0.5, 0.5],std=[0.5,0.5,0.5]), ]) vtoonify = VToonify(backbone = 'dualstylegan') vtoonify.load_state_dict(torch.load(os.path.join(MODEL_DIR, style_type+'_generator.pt'), map_location=lambda storage, loc: storage)['g_ema']) vtoonify.to(device) parsingpredictor = BiSeNet(n_classes=19) parsingpredictor.load_state_dict(torch.load(os.path.join(MODEL_DIR, 'faceparsing.pth'), map_location=lambda storage, loc: storage)) parsingpredictor.to(device).eval() modelname = './checkpoint/shape_predictor_68_face_landmarks.dat' if not os.path.exists(modelname): import wget, bz2 wget.download('http://dlib.net/files/shape_predictor_68_face_landmarks.dat.bz2', modelname+'.bz2') zipfile = bz2.BZ2File(modelname+'.bz2') data = zipfile.read() open(modelname, 'wb').write(data) landmarkpredictor = dlib.shape_predictor(modelname) pspencoder = load_psp_standalone(os.path.join(MODEL_DIR, 'encoder.pt'), device) exstyles = np.load(os.path.join(MODEL_DIR, style_type[:-3]+'_exstyle_code.npy'), allow_pickle='TRUE').item() stylename = list(exstyles.keys())[int(style_type[-3:])] exstyle = torch.tensor(exstyles[stylename]).to(device) with torch.no_grad(): exstyle = vtoonify.zplus2wplus(exstyle) print('Model successfully loaded!') |
最初に、画像でやってみましょう。picで画像を指定してクロップします。自分の用意した画像を使用する場合は、dataフォルダにアップロードして下さい。ここでは、01.jpg で実行します。
|
1 2 3 4 5 6 7 8 9 10 11 12 13 14 15 16 17 18 19 20 21 22 23 24 25 26 27 28 |
#@title **画像のクロップ** pic = '01.jpg' #@param {type:"string"} image_path = './data/'+pic frame = cv2.imread(image_path) frame = cv2.cvtColor(frame, cv2.COLOR_RGB2BGR) scale = 1 kernel_1d = np.array([[0.125],[0.375],[0.375],[0.125]]) # We detect the face in the image, and resize the image so that the eye distance is 64 pixels. # Centered on the eyes, we crop the image to almost 400x400 (based on args.padding). paras = get_video_crop_parameter(frame, landmarkpredictor, padding=[200,200,200,200]) if paras is not None: h,w,top,bottom,left,right,scale = paras H, W = int(bottom-top), int(right-left) # for HR image, we apply gaussian blur to it to avoid over-sharp stylization results if scale <= 0.75: frame = cv2.sepFilter2D(frame, -1, kernel_1d, kernel_1d) if scale <= 0.375: frame = cv2.sepFilter2D(frame, -1, kernel_1d, kernel_1d) frame = cv2.resize(frame, (w, h))[top:bottom, left:right] x = transform(frame).unsqueeze(dim=0).to(device) else: print('no face detected!') # 画像出力 save_image(x[0].cpu(),'befor.jpg') visualize(x[0].cpu(), 60) |

画像をアニメ化し、変換前後の比較画像を表示します。なお、変換前画像はbefor.jpg、変換後画像は after.jpg に保存されます。
|
1 2 3 4 5 6 7 8 9 10 11 12 13 14 15 16 17 18 19 20 21 22 23 24 25 26 27 28 29 |
#@title **画像のアニメ化** with torch.no_grad(): I = align_face(frame, landmarkpredictor) I = transform(I).unsqueeze(dim=0).to(device) s_w = pspencoder(I) s_w = vtoonify.zplus2wplus(s_w) s_w[:,:7] = exstyle[:,:7] # parsing network works best on 512x512 images, so we predict parsing maps on upsmapled frames # followed by downsampling the parsing maps x_p = F.interpolate(parsingpredictor(2*(F.interpolate(x, scale_factor=2, mode='bilinear', align_corners=False)))[0], scale_factor=0.5, recompute_scale_factor=False).detach() # we give parsing maps lower weight (1/16) inputs = torch.cat((x, x_p/16.), dim=1) # d_s has no effect when backbone is toonify y_tilde = vtoonify(inputs, s_w.repeat(inputs.size(0), 1, 1), d_s = 0.5) y_tilde = torch.clamp(y_tilde, -1, 1) # 画像出力 from google.colab.patches import cv2_imshow import cv2 clear_output() save_image(y_tilde[0].cpu(), 'after.jpg') img_befor = cv2.imread('befor.jpg') tmp = cv2.imread('after.jpg') img_after = cv2.resize(tmp, dsize=(W, H)) img = cv2.hconcat([img_befor, img_after]) cv2.imwrite('img.jpg', img) cv2_imshow(img) |
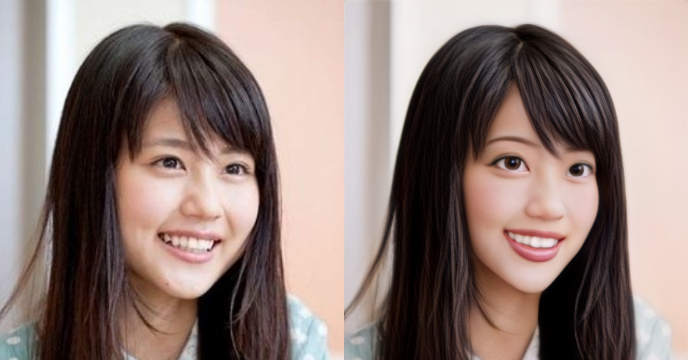
比較画像をダウンロードします(google chrome専用です)。なお、この画像は download フォルダに保存されます。
|
1 2 3 4 5 6 7 |
#@title **画像のダウンロード** from google.colab import files import os import shutil dst_file = 'download/'+os.path.splitext(pic)[0]+'_'+style_type+'.jpg' shutil.copy('img.jpg', dst_file) files.download(dst_file) |
次に、動画でやってみましょう。video で動画を指定してクロップします。自分の用意した動画を使用する場合は、dataフォルダにアップロードして下さい。ここでは、03.mp4 で実行します。
|
1 2 3 4 5 6 7 8 9 10 11 12 13 14 15 16 17 18 19 20 21 22 23 24 25 26 27 28 29 30 31 32 33 34 35 36 37 38 39 40 41 42 43 44 45 46 47 48 |
#@title **動画のクロップ** video = '03.mp4' #@param {type:"string"} video_path = './data/'+video video_cap = cv2.VideoCapture(video_path) num = int(video_cap.get(7)) success, frame = video_cap.read() if success == False: assert('load video frames error') frame = cv2.cvtColor(frame, cv2.COLOR_BGR2RGB) scale = 1 kernel_1d = np.array([[0.125],[0.375],[0.375],[0.125]]) # We proprocess the video by detecting the face in the first frame, # and resizing the frame so that the eye distance is 64 pixels. # Centered on the eyes, we crop the first frame to almost 400x400 (based on args.padding). # All other frames use the same resizing and cropping parameters as the first frame. paras = get_video_crop_parameter(frame, landmarkpredictor, padding=[200,200,200,200]) if paras is None: print('no face detected!') else: h,w,top,bottom,left,right,scale = paras H, W = int(bottom-top), int(right-left) # for HR video, we apply gaussian blur to the frames to avoid flickers caused by bilinear downsampling # this can also prevent over-sharp stylization results. if scale <= 0.75: frame = cv2.sepFilter2D(frame, -1, kernel_1d, kernel_1d) if scale <= 0.375: frame = cv2.sepFilter2D(frame, -1, kernel_1d, kernel_1d) frame = cv2.resize(frame, (w, h))[top:bottom, left:right] # 偶数補正 def even(x): if x % 2 != 0: x +=1 return x w = even(w) h = even(h) # ビデオクロップ ! ffmpeg -y -i $video_path -vf scale=$w:$h -loglevel error tmp.mp4 crop_size = 'crop='+str(W)+':'+str(H)+':'+str(left)+':'+str(top) ! ffmpeg -y -i tmp.mp4 -filter:v $crop_size -async 1 -loglevel error befor.mp4 display_mp4('befor.mp4') |
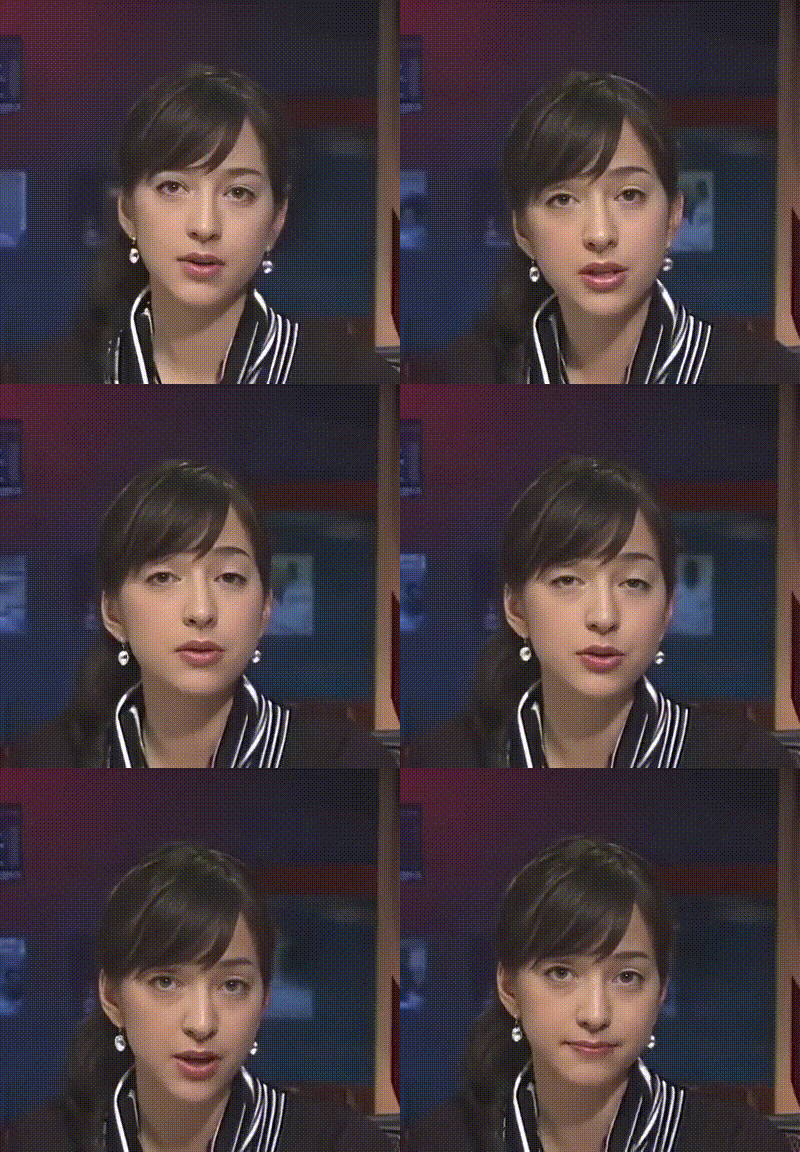
動画をアニメ化し、変換前後の比較動画を表示します。なお、変換前動画はbefor.mp4、変換後動画は after.mp4 に保存されます。
|
1 2 3 4 5 6 7 8 9 10 11 12 13 14 15 16 17 18 19 20 21 22 23 24 25 26 27 28 29 30 31 32 33 34 35 36 37 38 39 40 41 42 43 44 45 46 47 48 |
#@title **動画のアニメ化** fourcc = cv2.VideoWriter_fourcc(*'mp4v') videoWriter = cv2.VideoWriter(os.path.join(OUT_DIR, 'result.mp4'), fourcc, video_cap.get(5), (4*W, 4*H)) batch_size = 4 with torch.no_grad(): batch_frames = [] for i in tqdm(range(num)): if i == 0: I = align_face(frame, landmarkpredictor) I = transform(I).unsqueeze(dim=0).to(device) s_w = pspencoder(I) s_w = vtoonify.zplus2wplus(s_w) s_w[:,:7] = exstyle[:,:7] else: success, frame = video_cap.read() frame = cv2.cvtColor(frame, cv2.COLOR_BGR2RGB) if scale <= 0.75: frame = cv2.sepFilter2D(frame, -1, kernel_1d, kernel_1d) if scale <= 0.375: frame = cv2.sepFilter2D(frame, -1, kernel_1d, kernel_1d) frame = cv2.resize(frame, (w, h))[top:bottom, left:right] batch_frames += [transform(frame).unsqueeze(dim=0).to(device)] if len(batch_frames) == batch_size or (i+1) == num: x = torch.cat(batch_frames, dim=0) batch_frames = [] # parsing network works best on 512x512 images, so we predict parsing maps on upsmapled frames # followed by downsampling the parsing maps x_p = F.interpolate(parsingpredictor(2*(F.interpolate(x, scale_factor=2, mode='bilinear', align_corners=False)))[0], scale_factor=0.5, recompute_scale_factor=False).detach() # we give parsing maps lower weight (1/16) inputs = torch.cat((x, x_p/16.), dim=1) # d_s has no effect when backbone is toonify y_tilde = vtoonify(inputs, s_w.repeat(inputs.size(0), 1, 1), d_s = 0.5) y_tilde = torch.clamp(y_tilde, -1, 1) for k in range(y_tilde.size(0)): videoWriter.write(tensor2cv2(y_tilde[k].cpu())) videoWriter.release() video_cap.release() # 動画出力 clear_output() re_size = str(W)+'x'+str(H) ! ffmpeg -y -i ./output/result.mp4 -vcodec h264 -pix_fmt yuv420p -s $re_size -loglevel error after.mp4 ! ffmpeg -y -i befor.mp4 -i after.mp4 -filter_complex "hstack" -loglevel error output.mp4 display_mp4('output.mp4') |
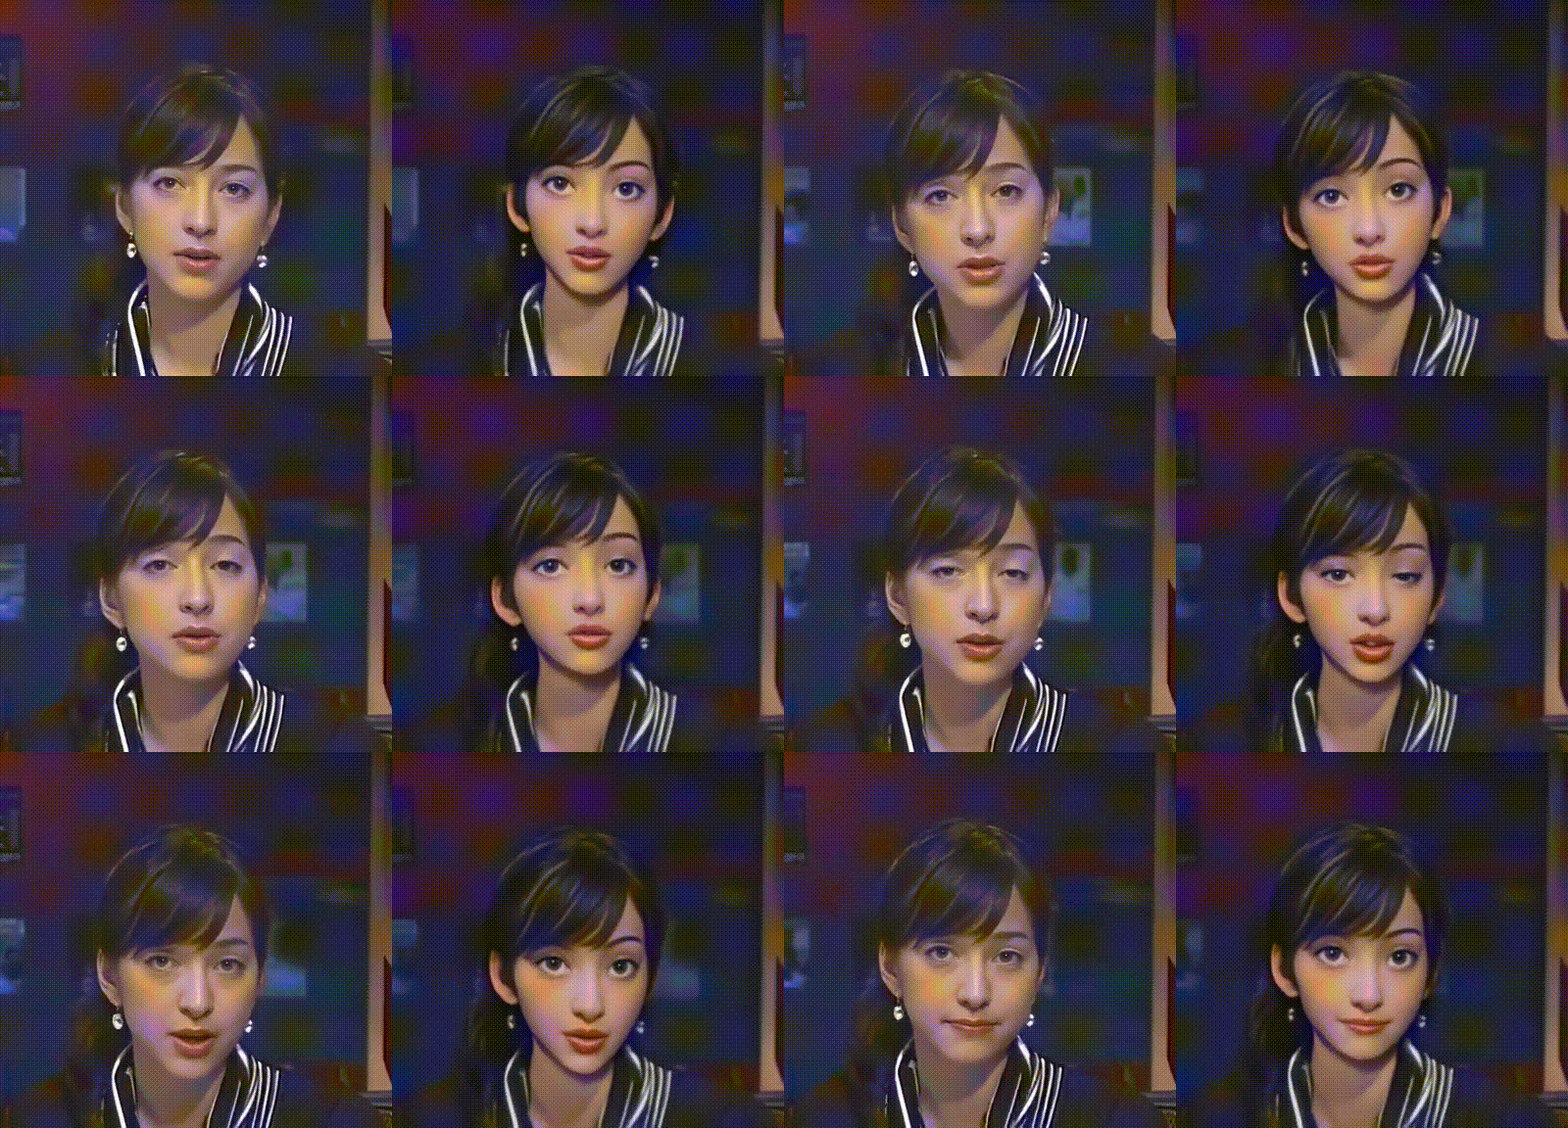
比較動画をダウンロードします(google chrome専用です)。なお、この動画は download フォルダに保存されます。
|
1 2 3 4 5 6 7 |
#@title **動画のダウンロード** from google.colab import files import os import shutil dst_file = 'download/'+os.path.splitext(video)[0]+'_'+style_type+'.mp4' shutil.copy('output.mp4', dst_file) files.download(dst_file) |
動画をもう1つやってみましょうか、今度は video = 02.mp4 です。
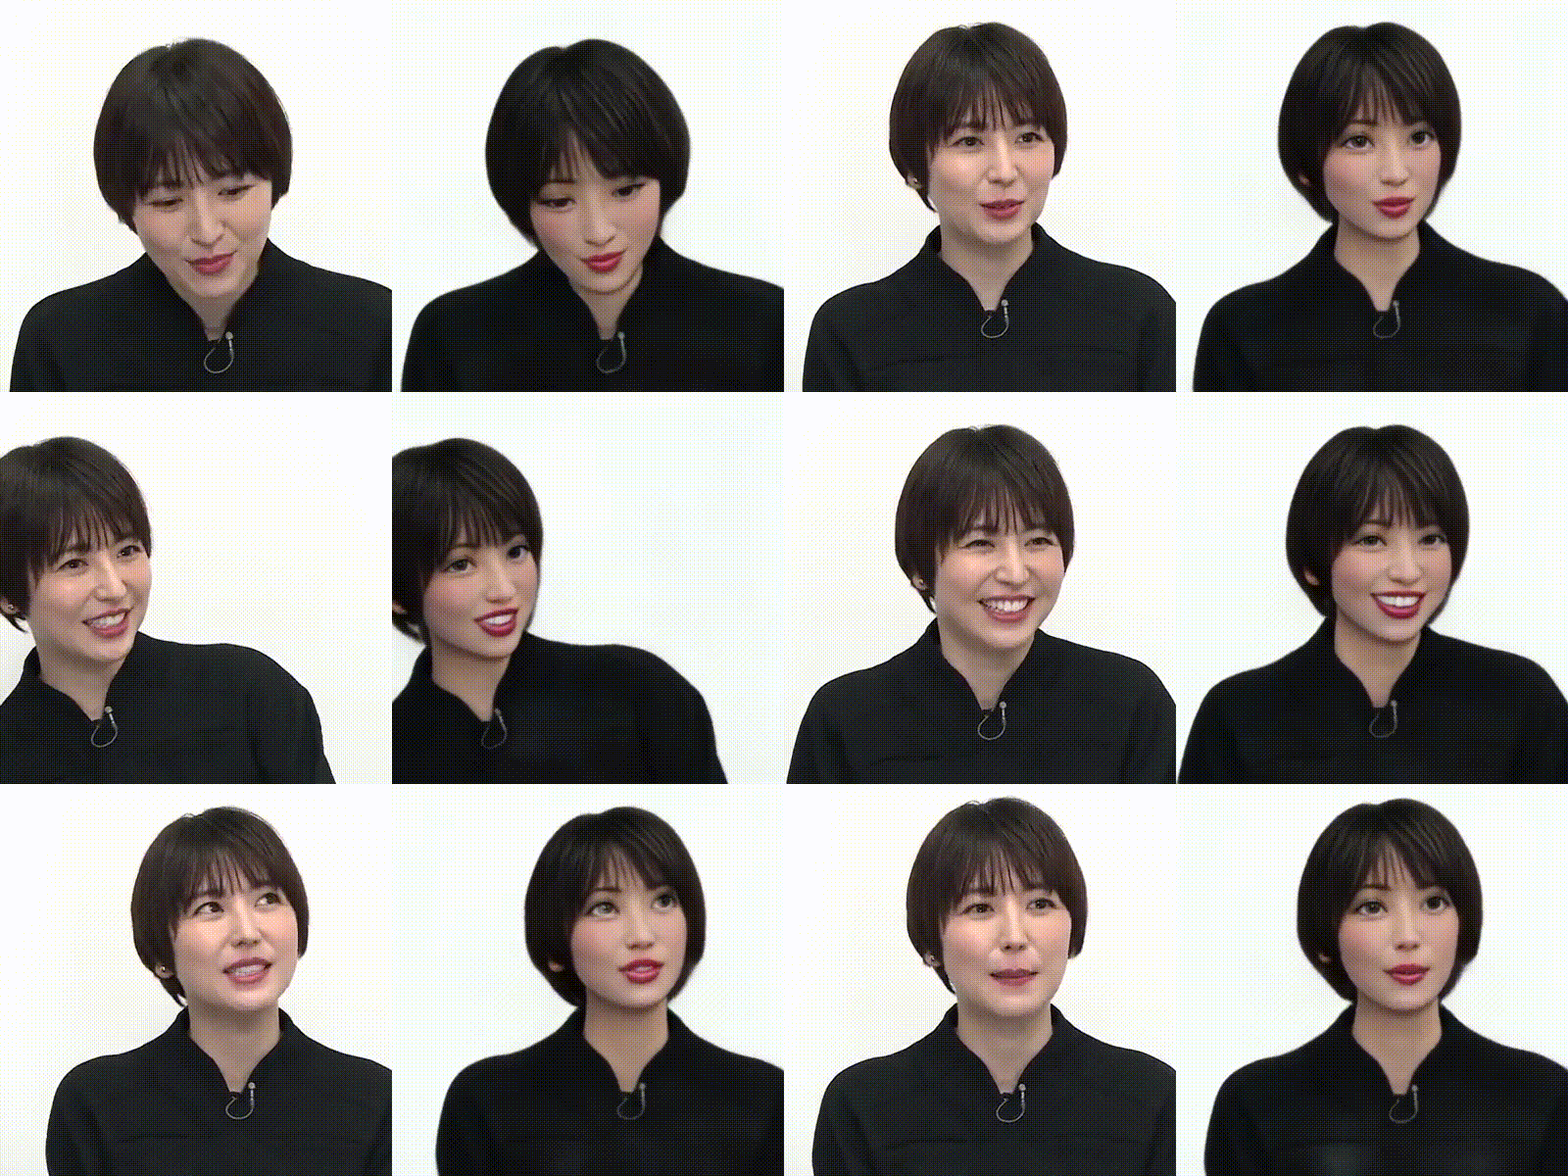
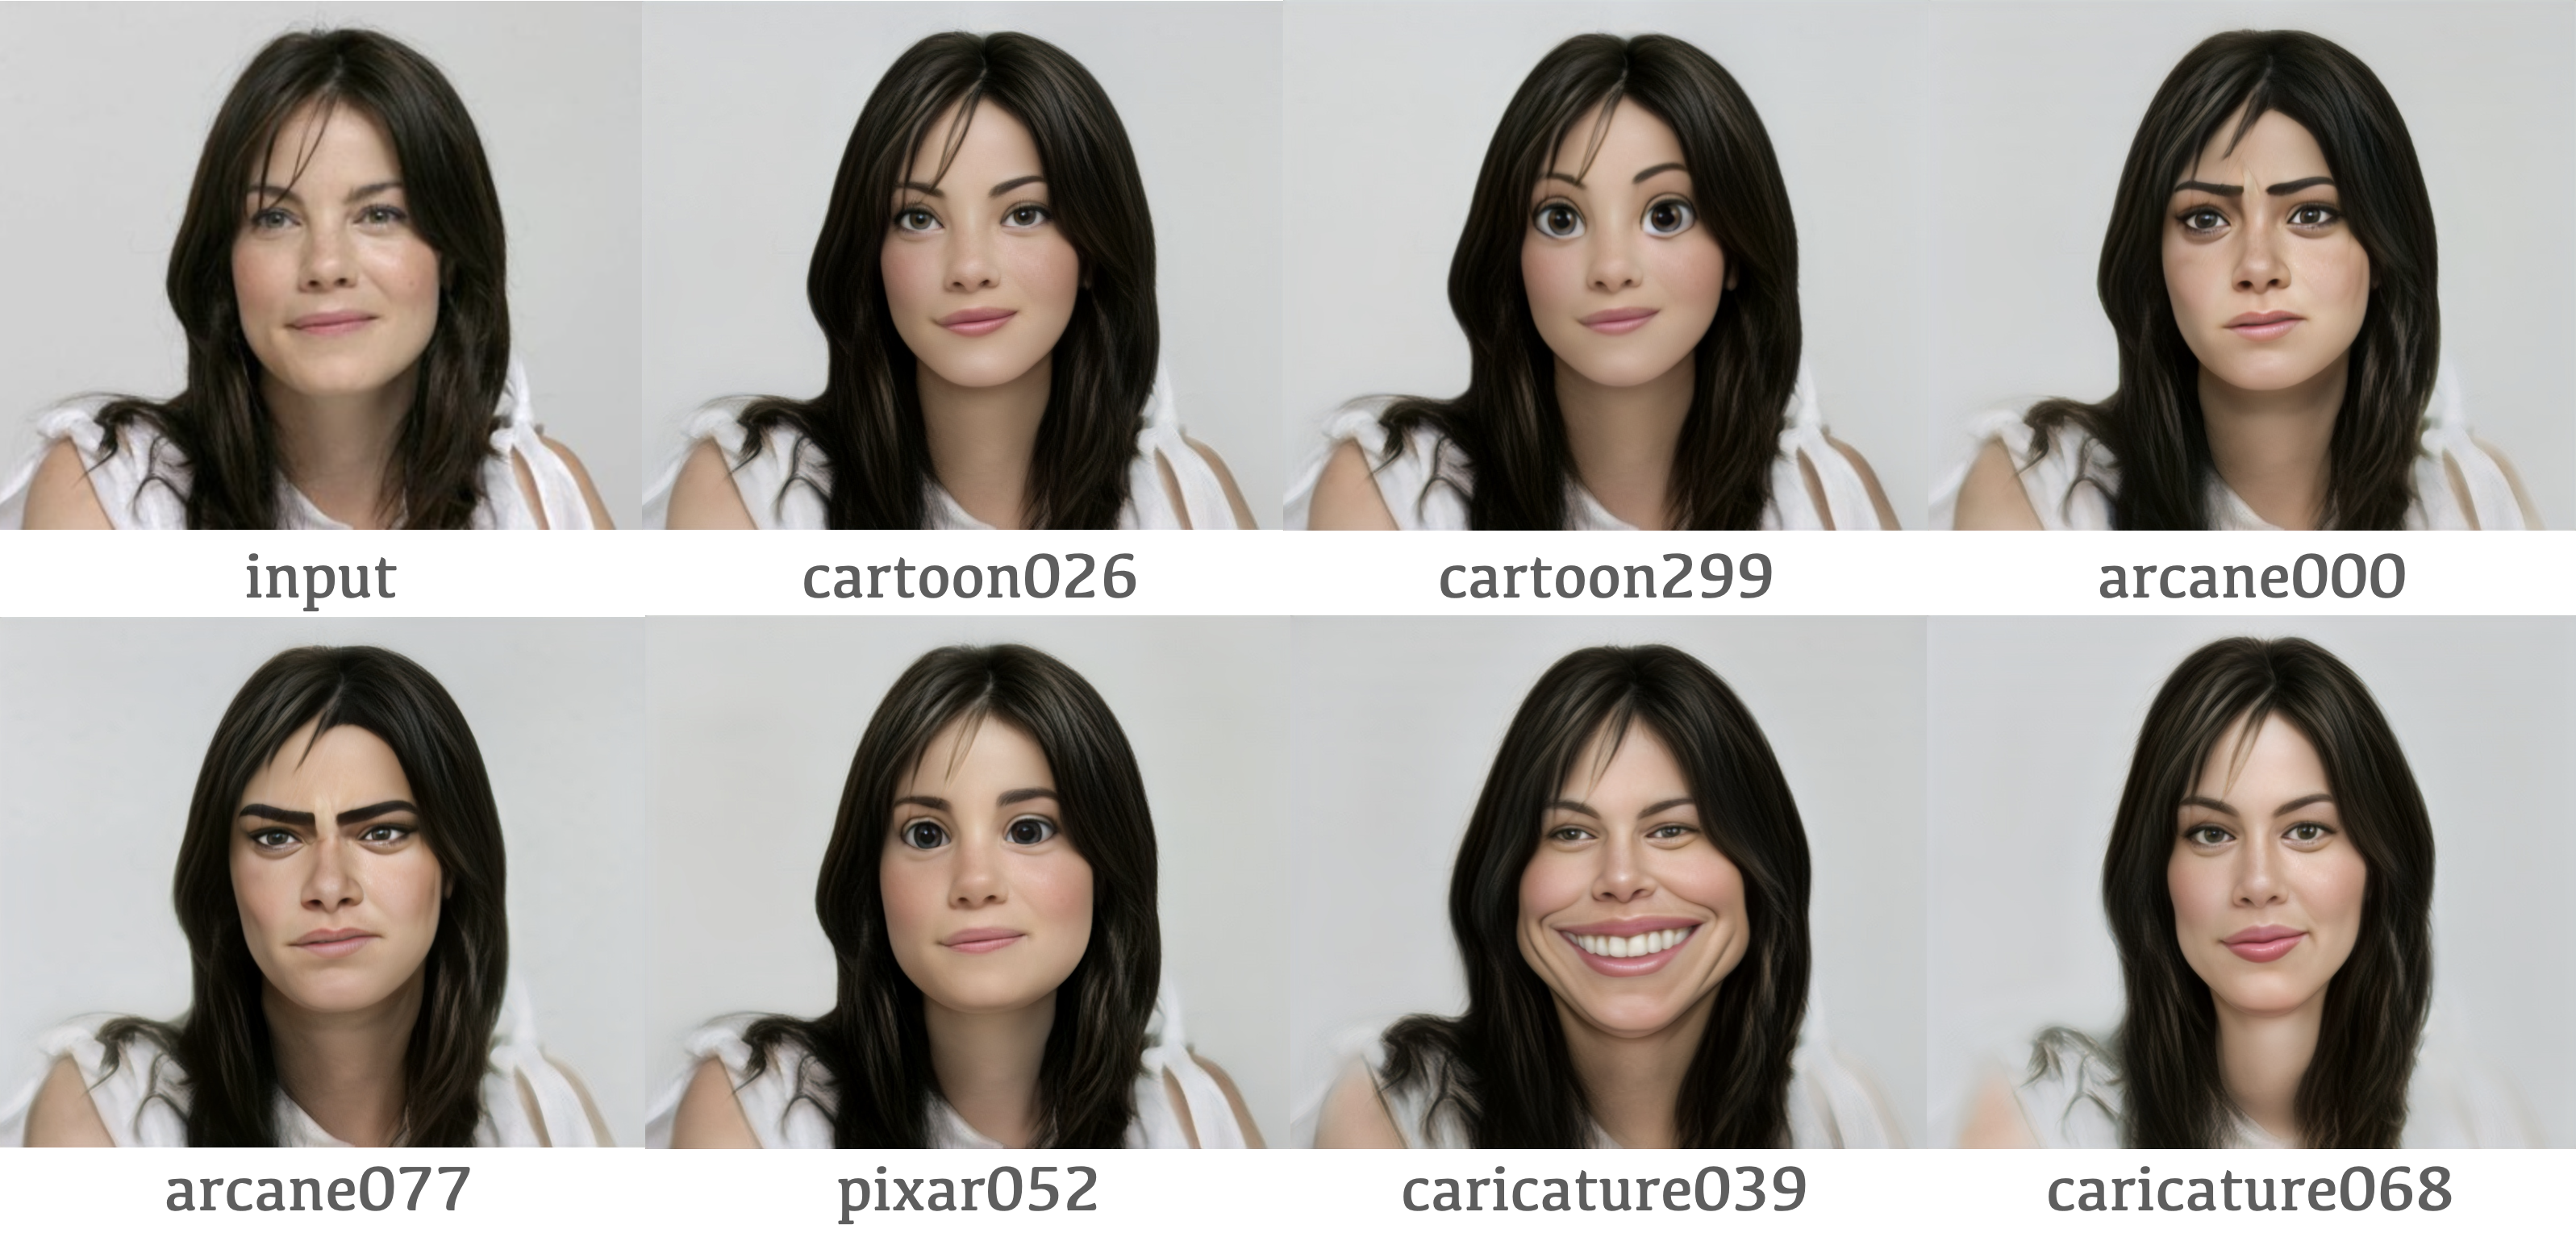
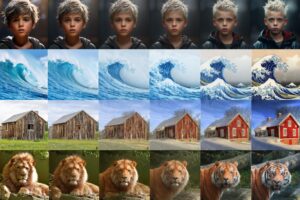
7つあるモデルのアニメ化サンプルは以下のようです。ちなみに、arcane077は男性向けのモデルです。
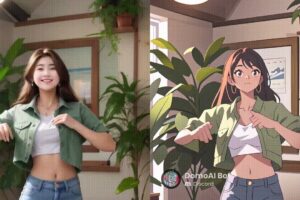
VToonify によって顔動画の様々なアニメ化が実用的になって来ましたね。
では、また。
(オリジナルgithub)https://github.com/williamyang1991/VToonify
(twitter投稿)



コメントを残す