1.はじめに
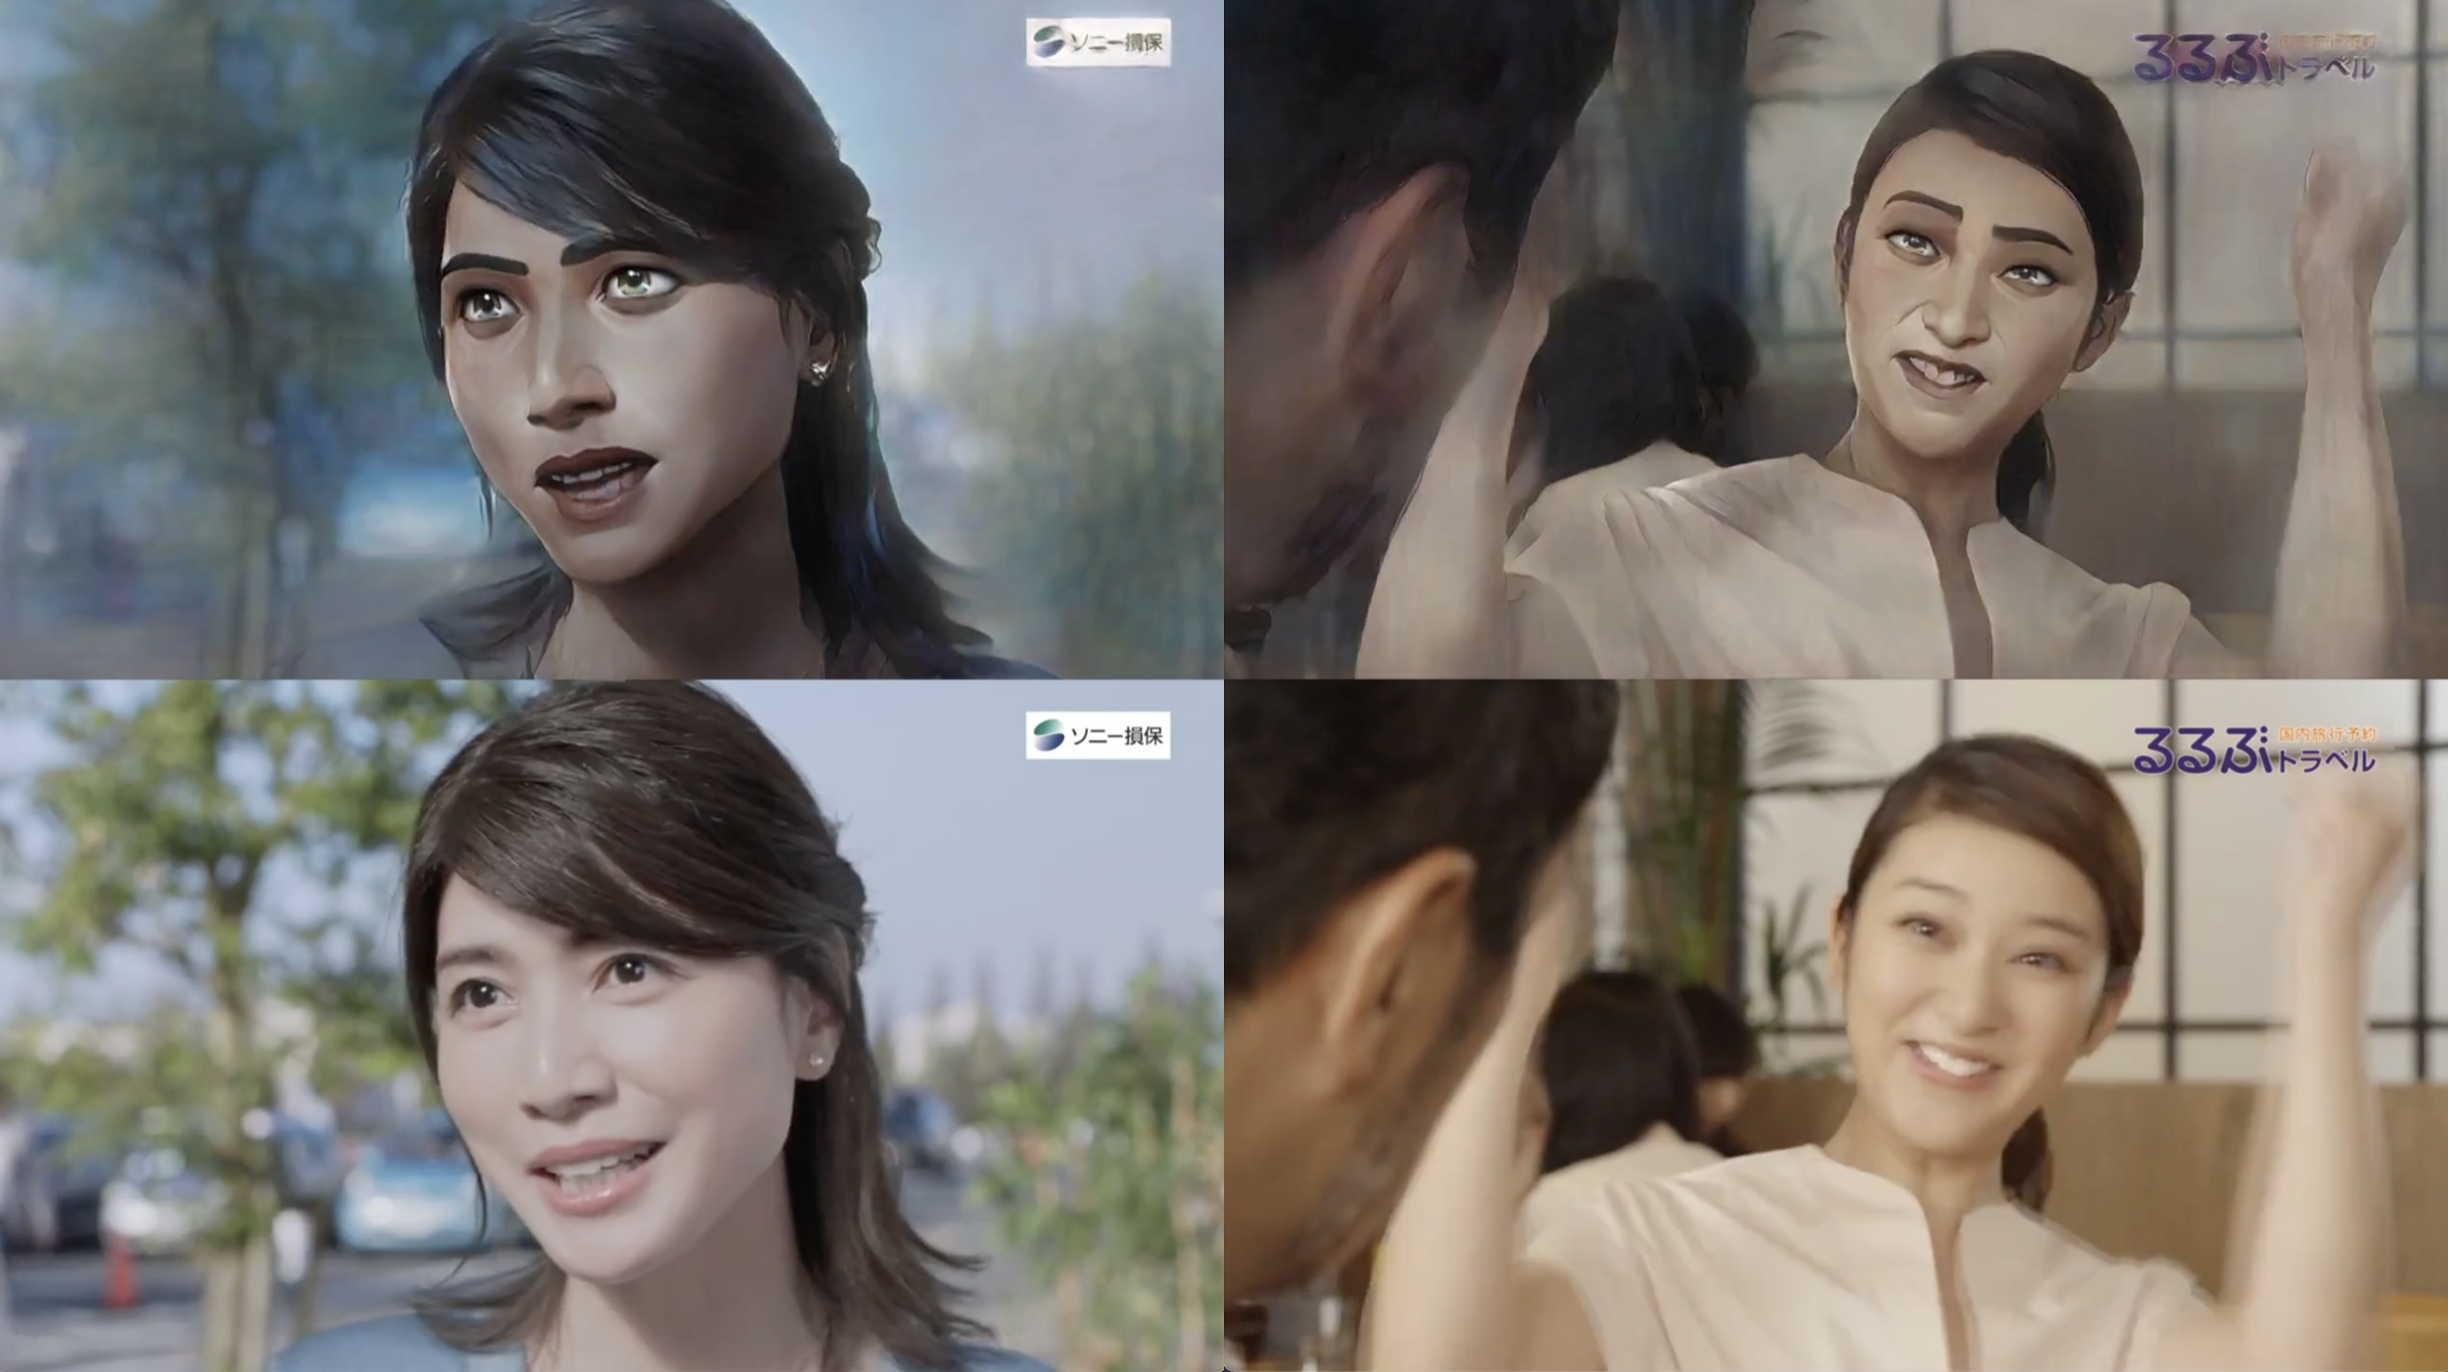
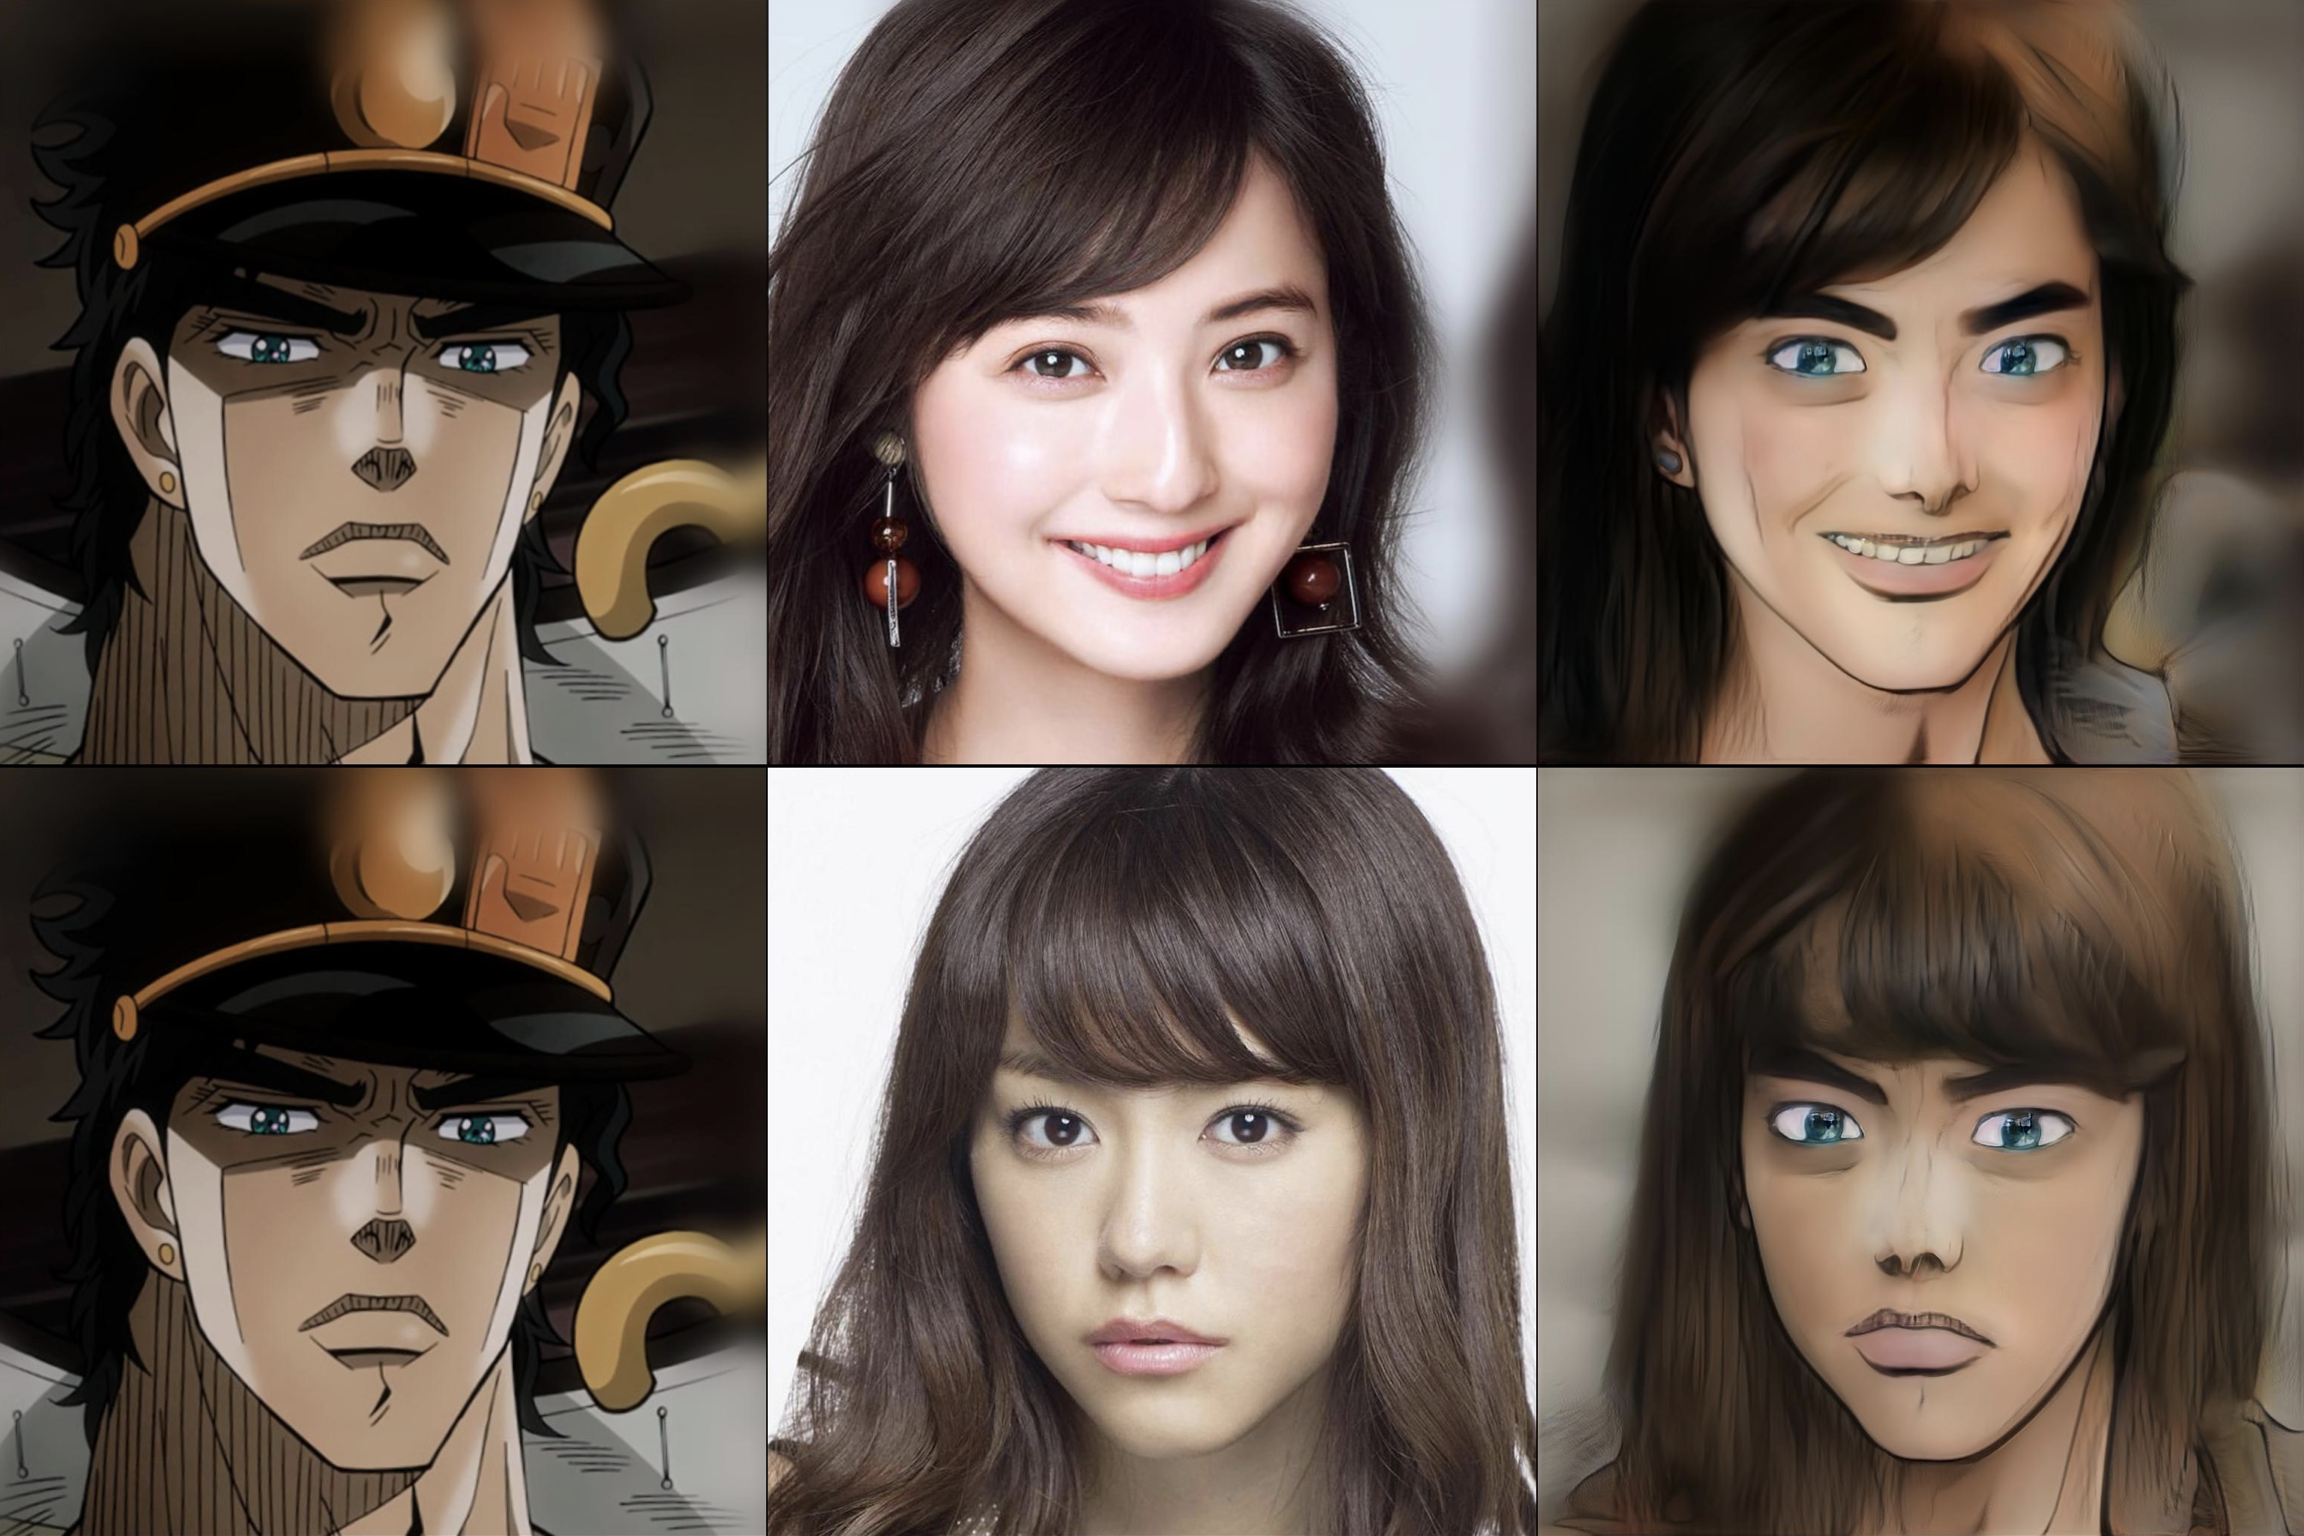
通常、StyleGANを使って実写をアニメ化する場合、入出力データは学習データと同様に顔画像を所定の位置に切り出した形(顔を垂直にし、目・鼻・口などの位置を合わせる)になるため、かなり表現に制約がありました。今回ご紹介するArcaneGANは、この制約を解消したモデルです。
2.ArcaneGANとは?
StyleGANを使った実写のアニメ化は、一般的によく使われるレイヤー交換方式を採用し、学習時には様々なデータ・オーギュメンテーション(回転・ズーム・クロップ・平行移動など)を掛けてそのままの位置で変換ができるようにしています。
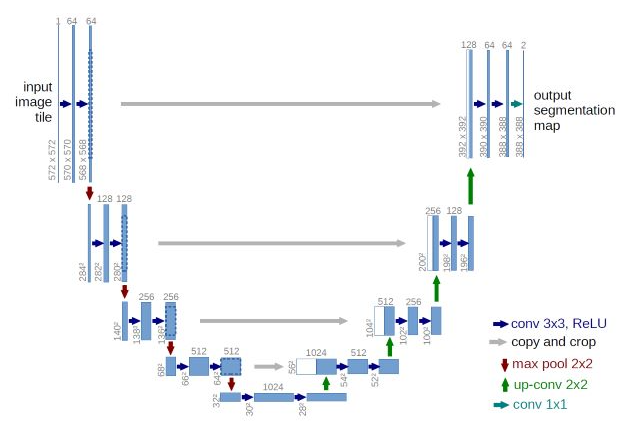
そして、下記の様なU -Netを組み合わせることによって、顔の部分だけを実写からアニメに入れ替えることを可能にし、背景をセットで実写のアニメ化しても背景がブレないところが、このモデルの素晴らしいところです。
3.コード
コードはGoogle Colabで動かす形にしてGithubに上げてありますので、それに沿って説明して行きます。自分で動かしてみたい方は、この「リンク」をクリックし表示されたノートブックの先頭にある「Colab on Web」ボタンをクリックすると動かせます。
なお、今回のColabはコード非表示にしてありますので、コードを見る場合は「コード表示」をクリックして下さい。
まず、セットアップをおこないます。
|
1 2 3 4 5 6 7 8 9 10 11 |
#@title インストール #release v0.2 !wget https://github.com/Sxela/ArcaneGAN/releases/download/v0.1/ArcaneGANv0.1.jit !wget https://github.com/Sxela/ArcaneGAN/releases/download/v0.2/ArcaneGANv0.2.jit !wget https://github.com/Sxela/ArcaneGAN/releases/download/v0.3/ArcaneGANv0.3.jit !pip -qq install facenet_pytorch # サンプル動画ダウンロード import gdown gdown.download('https://drive.google.com/uc?id=16ei31SsXRqjDM1h6FNeQJALKnbb_huyS', './movies.zip', quiet=False) ! unzip movies.zip |
次に初期設定を行います。versionは「0.1, 0.2, 0.3」の3つの中から選択します。out_x_size, out_y_sizeは、アニメ化する画像のサイズの設定です。
|
1 2 3 4 5 6 7 8 9 10 11 12 13 14 15 16 17 18 19 20 21 22 23 24 25 26 27 28 29 30 31 32 33 34 35 36 37 38 39 40 41 42 43 44 45 46 47 48 49 50 51 52 53 54 55 56 57 58 59 60 61 62 63 64 65 66 67 68 69 70 71 72 73 74 75 76 77 78 79 80 81 82 83 84 85 86 87 88 89 90 91 92 93 94 95 96 97 98 99 100 101 102 103 104 105 106 107 108 109 110 111 112 113 114 115 116 117 118 119 120 121 122 123 124 125 126 127 128 129 130 131 132 133 134 135 136 137 138 139 140 141 142 143 144 145 146 147 148 149 150 151 152 153 154 155 156 157 158 159 160 161 162 163 164 165 166 167 168 169 170 171 172 173 174 175 176 177 178 179 180 181 182 183 |
#@title 初期設定 #@markdown Select model version version = '0.3' #@param ['0.1','0.2','0.3'] out_x_size = '1280' #@param {type:"string"} out_y_size = '720' #@param {type:"string"} x_size = int(out_x_size) y_size = int(out_y_size) from facenet_pytorch import MTCNN from torchvision import transforms import torch, PIL from tqdm.notebook import tqdm mtcnn = MTCNN(image_size=256, margin=80) # simplest ye olde trustworthy MTCNN for face detection with landmarks def detect(img): # Detect faces batch_boxes, batch_probs, batch_points = mtcnn.detect(img, landmarks=True) # Select faces if not mtcnn.keep_all: batch_boxes, batch_probs, batch_points = mtcnn.select_boxes( batch_boxes, batch_probs, batch_points, img, method=mtcnn.selection_method ) return batch_boxes, batch_points # my version of isOdd, should make a separate repo for it :D def makeEven(_x): return _x if (_x % 2 == 0) else _x+1 # the actual scaler function def scale(boxes, _img, max_res=1_500_000, target_face=256, fixed_ratio=0, max_upscale=2, VERBOSE=False): x, y = _img.size ratio = 2 #initial ratio #scale to desired face size if (boxes is not None): if len(boxes)>0: ratio = target_face/max(boxes[0][2:]-boxes[0][:2]); ratio = min(ratio, max_upscale) if VERBOSE: print('up by', ratio) if fixed_ratio>0: if VERBOSE: print('fixed ratio') ratio = fixed_ratio x*=ratio y*=ratio #downscale to fit into max res res = x*y if res > max_res: ratio = pow(res/max_res,1/2); if VERBOSE: print(ratio) x=int(x/ratio) y=int(y/ratio) #make dimensions even, because usually NNs fail on uneven dimensions due skip connection size mismatch x = makeEven(int(x)) y = makeEven(int(y)) size = (x, y) return _img.resize(size) """ A useful scaler algorithm, based on face detection. Takes PIL.Image, returns a uniformly scaled PIL.Image boxes: a list of detected bboxes _img: PIL.Image max_res: maximum pixel area to fit into. Use to stay below the VRAM limits of your GPU. target_face: desired face size. Upscale or downscale the whole image to fit the detected face into that dimension. fixed_ratio: fixed scale. Ignores the face size, but doesn't ignore the max_res limit. max_upscale: maximum upscale ratio. Prevents from scaling images with tiny faces to a blurry mess. """ def scale_by_face_size(_img, max_res=1_500_000, target_face=256, fix_ratio=0, max_upscale=2, VERBOSE=False): boxes = None boxes, _ = detect(_img) if VERBOSE: print('boxes',boxes) img_resized = scale(boxes, _img, max_res, target_face, fix_ratio, max_upscale, VERBOSE) return img_resized.resize((x_size, y_size)) size = 256 means = [0.485, 0.456, 0.406] stds = [0.229, 0.224, 0.225] t_stds = torch.tensor(stds).cuda().half()[:,None,None] t_means = torch.tensor(means).cuda().half()[:,None,None] def makeEven(_x): return int(_x) if (_x % 2 == 0) else int(_x+1) img_transforms = transforms.Compose([ transforms.ToTensor(), transforms.Normalize(means,stds)]) def tensor2im(var): return var.mul(t_stds).add(t_means).mul(255.).clamp(0,255).permute(1,2,0) def proc_pil_img(input_image, model): transformed_image = img_transforms(input_image)[None,...].cuda().half() with torch.no_grad(): result_image = model(transformed_image)[0]; print(result_image.shape) output_image = tensor2im(result_image) output_image = output_image.detach().cpu().numpy().astype('uint8') output_image = PIL.Image.fromarray(output_image) return output_image #load model model_path = f'/content/ArcaneGANv{version}.jit' in_dir = '/content/in' out_dir = f"/content/{model_path.split('/')[-1][:-4]}_out" model = torch.jit.load(model_path).eval().cuda().half() #setup colab interface from google.colab import files import ipywidgets as widgets from IPython.display import clear_output from IPython.display import display import os from glob import glob def reset(p): with output_reset: clear_output() clear_output() process() button_reset = widgets.Button(description="Upload") output_reset = widgets.Output() button_reset.on_click(reset) def fit(img,maxsize=512): maxdim = max(*img.size) if maxdim>maxsize: ratio = maxsize/maxdim x,y = img.size size = (int(x*ratio),int(y*ratio)) img = img.resize(size) return img def show_img(f, size=1024): display(fit(PIL.Image.open(f),size)) def process(upload=False): os.makedirs(in_dir, exist_ok=True) %cd {in_dir}/ !rm -rf {out_dir}/* os.makedirs(out_dir, exist_ok=True) in_files = sorted(glob(f'{in_dir}/*')) if (len(in_files)==0) | (upload): !rm -rf {in_dir}/* uploaded = files.upload() if len(uploaded.keys())<=0: print('\nNo files were uploaded. Try again..\n') return in_files = sorted(glob(f'{in_dir}/*')) for img in tqdm(in_files): out = f"{out_dir}/{img.split('/')[-1].split('.')[0]}.jpg" im = PIL.Image.open(img) im = scale_by_face_size(im, target_face=300, max_res=1_500_000, max_upscale=2) res = proc_pil_img(im, model) #res = res.resize((1280, 720)) ###resize res.save(out) #out_zip = f"{out_dir}.zip" #!zip {out_zip} {out_dir}/* processed = sorted(glob(f'{out_dir}/*'))[:3] for f in processed: show_img(f, 256) |
それでは、サンプル動画を静止画にバラします。自分の動画を使用したい場合は、content 直下にアップロードして下さい。ここでは、movieを01.mp4と設定します。
|
1 2 3 4 5 6 7 8 9 10 11 12 13 14 15 16 17 18 19 20 21 22 23 24 25 26 27 28 29 30 31 32 33 34 35 36 37 38 39 40 41 |
#@title 動画を静止画にバラす movie = '01.mp4' #@param {type:"string"} video_file = '/content/'+movie import os import shutil import cv2 # flamesフォルダーリセット if os.path.isdir('/content/in'): shutil.rmtree('/content/in') os.makedirs('/content/in', exist_ok=True) def video_2_images(video_file= video_file, # ビデオの指定 image_dir='/content/in/', image_file='%s.jpg'): # Initial setting i = 0 interval = 1 length = 3000 # 最大フレーム数 cap = cv2.VideoCapture(video_file) fps = cap.get(cv2.CAP_PROP_FPS) # fps取得 while(cap.isOpened()): flag, frame = cap.read() if flag == False: break if i == length*interval: break if i % interval == 0: cv2.imwrite(image_dir+image_file % str(int(i/interval)).zfill(6), frame) i += 1 cap.release() return fps, i, interval fps, i, interval = video_2_images() print('fps = ', fps) print('flames = ', i) print('interval = ', interval) |

それでは、バラした静止画を1枚づつアニメ化して行きます。変換が完了すると、最初の3枚のみアニメ画像を表示します。
|
1 2 3 4 5 6 |
#@title 静止画をアニメに変換 process() %cd .. # コード内でカレントディレクトリを/content/inに移しているので、最後に/contentに戻す # そうしないと、動画から静止画をバラすときに/content/inを一旦削除するためカレントディレクトリを見失うため |
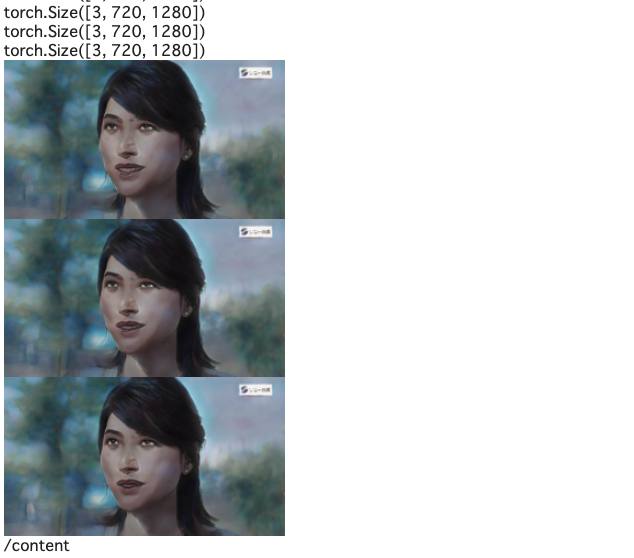
そして、アニメから動画を作成します。
|
1 2 3 4 5 6 7 8 9 10 11 12 |
#@title アニメから動画を作成 # リセットファイル if os.path.exists('/content/output.mp4'): os.remove('/content/output.mp4') if version == '0.1': ! ffmpeg -r $fps -i /content/ArcaneGANv0.1_out/%06d.jpg -vcodec libx264 -pix_fmt yuv420p /content/output.mp4 if version == '0.2': ! ffmpeg -r $fps -i /content/ArcaneGANv0.2_out/%06d.jpg -vcodec libx264 -pix_fmt yuv420p /content/output.mp4 if version == '0.3': ! ffmpeg -r $fps -i /content/ArcaneGANv0.3_out/%06d.jpg -vcodec libx264 -pix_fmt yuv420p /content/output.mp4 |
|
1 2 3 4 5 6 7 8 9 10 |
#@title 動画の再生 from IPython.display import HTML from base64 import b64encode mp4 = open('/content/output.mp4', 'rb').read() data_url = 'data:video/mp4;base64,' + b64encode(mp4).decode() HTML(f""" <video width="70%" height="70%" controls> <source src="{data_url}" type="video/mp4"> </video>""") |
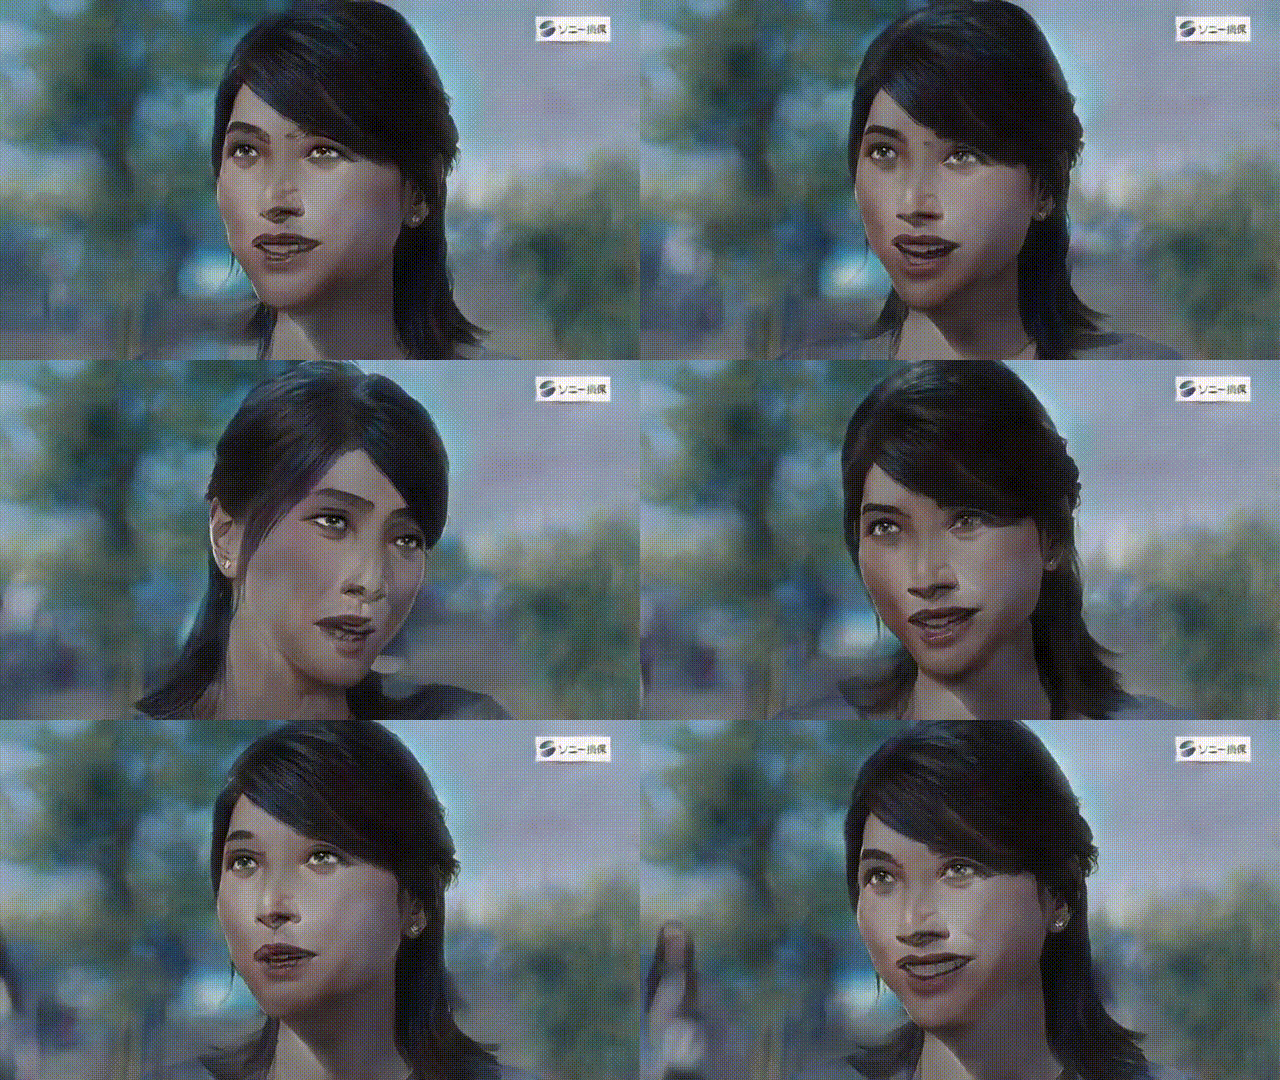
いかがでしょうか。背景込みでアニメ化できるので、とても表現力が上がりますね。
もう1つやってみましょう。「動画を静止画にバラす」の所で movie を 04.mp4で選ぶと、こんな感じ
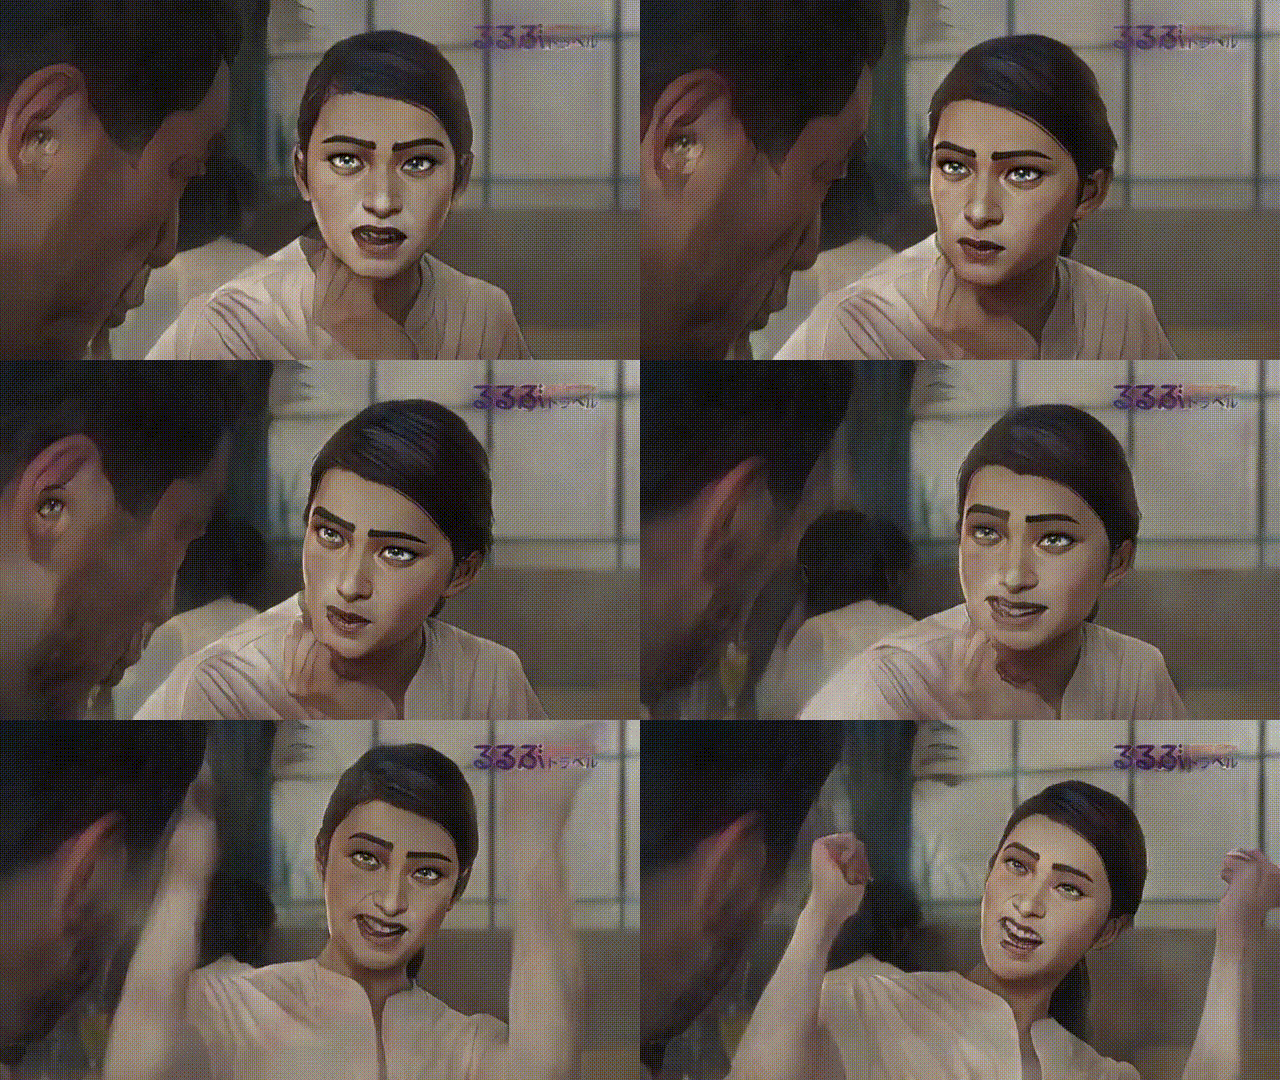
このモデル、取り立てて新しい技術は使われていないのですが、素晴らしい結果を出してくれるクールなモデルだと思います。
では、また。
(オリジナルgithub)https://github.com/Sxela/ArcaneGAN
2021.12.26 colabにv0.4を追加
より自然な変換ができるv0.4を追加しました。
colab リンク:https://github.com/cedro3/others2/blob/main/ArcaneGAN_latest.ipynb
(twitter投稿)





コメントを残す