今回は、DCGANの推論実行時に、入力ベクトルを操作することによって、生成画像のカテゴリーをコントロールしてみます(前編)。
こんにちは cedro です。
前々回、Conditional GAN を使って生成する画像のカテゴリー(顔画像の向き)をコントロールしてみましたが、カテゴリーのコントロールには、それ以外にも方法があります。
学習を完了した後、推論実行時は、ネットワークの重みの設定は固定されていますので、生成される画像と入力ベクトルは一対一で対応します。
入力がランダムノイズによるベクトルになっているので通常はありえませんが、もし全く同じベクトルが入力されれば、全く同じ画像が生成されると言うことです。
ということは、推論実行時に生成される画像をカテゴリー分けして、その画像を生成した時の入力ベクトルの平均を計算します。これを画像生成器の入力にオフセットで加えてやれば、同様なコントロールができるはずです。
今回は、「前編」・「後編」の2部構成でお届けします。まず、「前編」は、顔画像生成器の作成までをやってみます。
ネットワークの設計
今回は、NNabla のサンプルプログラム dcagn.py ( NNabla-examples-master にあります)を改造して使います。
|
1 2 3 4 5 6 7 8 9 10 11 12 13 14 15 16 17 18 19 20 21 22 23 24 25 26 27 28 29 30 31 32 33 34 35 36 37 38 39 40 41 42 43 44 45 46 47 48 49 50 51 52 53 54 55 56 57 58 59 60 61 62 63 64 65 66 67 68 69 70 71 72 73 74 75 76 77 78 79 80 81 82 83 84 85 86 87 88 89 90 91 92 93 94 95 96 97 98 99 100 101 102 103 104 105 106 107 108 109 110 111 112 113 114 115 116 117 118 119 120 121 122 123 124 125 126 127 128 129 130 131 132 133 134 135 136 137 138 139 140 141 142 143 144 145 146 147 148 149 150 151 152 153 154 155 156 157 158 159 160 161 162 163 164 165 166 167 168 169 170 171 172 173 174 175 176 177 178 179 180 181 182 183 184 185 186 187 188 189 190 191 192 193 194 195 196 197 198 199 200 201 202 203 204 205 206 207 208 209 210 211 212 213 214 |
# Copyright (c) 2017 Sony Corporation. All Rights Reserved. # # Licensed under the Apache License, Version 2.0 (the "License"); # you may not use this file except in compliance with the License. # You may obtain a copy of the License at # # http://www.apache.org/licenses/LICENSE-2.0 # # Unless required by applicable law or agreed to in writing, software # distributed under the License is distributed on an "AS IS" BASIS, # WITHOUT WARRANTIES OR CONDITIONS OF ANY KIND, either express or implied. # See the License for the specific language governing permissions and # limitations under the License. from __future__ import absolute_import from six.moves import range import numpy as np import nnabla as nn import nnabla.logger as logger import nnabla.functions as F import nnabla.parametric_functions as PF import nnabla.solvers as S import nnabla.utils.save as save import nnabla.utils.data_iterator as d from args import get_args import os def generator(z, maxh=1024, test=False, output_hidden=False): """ Building generator network which takes (B, Z, 1, 1) inputs and generates (B, 3, 64, 64) outputs. """ # Define shortcut functions def bn(x): # Batch normalization return PF.batch_normalization(x, batch_stat=not test) def upsample2(x, c): # Twise upsampling with deconvolution. return PF.deconvolution(x, c, kernel=(4, 4), pad=(1, 1), stride=(2, 2), with_bias=False) assert maxh / 4 > 0 with nn.parameter_scope("gen"): # (Z, 1, 1) --> (1024, 4, 4) with nn.parameter_scope("deconv1"): d1 = F.elu(bn(PF.deconvolution(z, maxh, (4, 4), with_bias=False))) # (1024, 4, 4) --> (512, 8, 8) with nn.parameter_scope("deconv2"): d2 = F.elu(bn(upsample2(d1, maxh / 2))) # (512, 8, 8) --> (256, 16, 16) with nn.parameter_scope("deconv3"): d3 = F.elu(bn(upsample2(d2, maxh / 4))) # (256, 16, 16) --> (128, 32, 32) with nn.parameter_scope("deconv4"): d4 = F.elu(bn(upsample2(d3, maxh / 8))) # (128, 32, 32) --> (64, 64, 64) with nn.parameter_scope("deconv5"): d5 = F.elu(bn(upsample2(d4, maxh / 16))) # (64, 64, 64) --> (3, 64, 64) with nn.parameter_scope("conv6"): x = F.tanh(PF.convolution(d5, 3, (3, 3), pad=(1, 1))) if output_hidden: return x, [d1, d2, d3, d4, d5] return x def discriminator(x, maxh=1024, test=False, output_hidden=False): """ Building discriminator network which maps a (B, 3, 64, 64) input to a (B, 1). """ # Define shortcut functions def bn(xx): # Batch normalization return PF.batch_normalization(xx, batch_stat=not test) def downsample2(xx, c): return PF.convolution(xx, c, (3, 3), pad=(1, 1), stride=(2, 2), with_bias=False) assert maxh / 8 > 0 with nn.parameter_scope("dis"): # (3, 64, 64) --> (64, 32, 32) with nn.parameter_scope("conv1"): c1 = F.elu(bn(downsample2(x, maxh / 16))) # (64, 32, 32) --> (128, 16, 16) with nn.parameter_scope("conv2"): c2 = F.elu(bn(downsample2(c1, maxh / 8))) # (128, 16, 16) --> (256, 8, 8) with nn.parameter_scope("conv3"): c3 = F.elu(bn(downsample2(c2, maxh / 4))) # (256, 8, 8) --> (512, 4, 4) with nn.parameter_scope("conv4"): c4 = F.elu(bn(downsample2(c3, maxh / 2))) # (512, 4, 4) --> (1024, 4, 4) with nn.parameter_scope("conv5"): c5 = bn(PF.convolution(c4, maxh, (3, 3), pad=(1, 1), with_bias=False)) # (256, 4, 4) --> (1,) with nn.parameter_scope("fc1"): f = PF.affine(c5, 1) if output_hidden: return f, [c1, c2, c3, c4, c5] return f def train(args): """ Main script. """ # Get context. from nnabla.ext_utils import get_extension_context logger.info("Running in %s" % args.context) ctx = get_extension_context( args.context, device_id=args.device_id, type_config=args.type_config) nn.set_default_context(ctx) # Create CNN network for both training and testing. # TRAIN # Fake path z = nn.Variable([args.batch_size, 100, 1, 1]) fake = generator(z) fake.persistent = True # Not to clear at backward pred_fake = discriminator(fake) loss_gen = F.mean(F.sigmoid_cross_entropy( pred_fake, F.constant(1, pred_fake.shape))) fake_dis = fake.unlinked() pred_fake_dis = discriminator(fake_dis) loss_dis = F.mean(F.sigmoid_cross_entropy( pred_fake_dis, F.constant(0, pred_fake_dis.shape))) # Real path x = nn.Variable([args.batch_size, 3, 64, 64]) pred_real = discriminator(x) loss_dis += F.mean(F.sigmoid_cross_entropy(pred_real, F.constant(1, pred_real.shape))) # Create Solver. solver_gen = S.Adam(args.learning_rate, beta1=0.5) solver_dis = S.Adam(args.learning_rate, beta1=0.5) with nn.parameter_scope("gen"): solver_gen.set_parameters(nn.get_parameters()) with nn.parameter_scope("dis"): solver_dis.set_parameters(nn.get_parameters()) # Create monitor. import nnabla.monitor as M monitor = M.Monitor(args.monitor_path) monitor_loss_gen = M.MonitorSeries("Generator loss", monitor, interval=10) monitor_loss_dis = M.MonitorSeries( "Discriminator loss", monitor, interval=10) monitor_time = M.MonitorTimeElapsed("Time", monitor, interval=10) monitor_fake = M.MonitorImageTile( "Fake images", monitor, interval=100, num_images=16, normalize_method=lambda x: x + 1 / 2.) data = d.data_iterator_csv_dataset(".\\face_train.csv", args.batch_size, shuffle=True, normalize=False) # Training loop. for i in range(args.max_iter): if i % args.model_save_interval == 0: with nn.parameter_scope("gen"): nn.save_parameters(os.path.join( args.model_save_path, "generator_param_%06d.h5" % i)) with nn.parameter_scope("dis"): nn.save_parameters(os.path.join( args.model_save_path, "discriminator_param_%06d.h5" % i)) # Training forward image, _ = data.next() x.d = image / 255. - 0.5 # [0, 255] to [-1, 1] z.d = np.random.randn(*z.shape) # Generator update. solver_gen.zero_grad() loss_gen.forward(clear_no_need_grad=True) loss_gen.backward(clear_buffer=True) solver_gen.weight_decay(args.weight_decay) solver_gen.update() monitor_fake.add(i, fake) monitor_loss_gen.add(i, loss_gen.d.copy()) # Discriminator update. solver_dis.zero_grad() loss_dis.forward(clear_no_need_grad=True) loss_dis.backward(clear_buffer=True) solver_dis.weight_decay(args.weight_decay) solver_dis.update() monitor_loss_dis.add(i, loss_dis.d.copy()) monitor_time.add(i) with nn.parameter_scope("gen"): nn.save_parameters(os.path.join( args.model_save_path, "generator_param_%06d.h5" % i)) with nn.parameter_scope("dis"): nn.save_parameters(os.path.join( args.model_save_path, "discriminator_param_%06d.h5" % i)) if __name__ == '__main__': monitor_path = 'tmp.monitor.dcgan' args = get_args(monitor_path=monitor_path, model_save_path=monitor_path, max_iter=20000, learning_rate=0.0002, batch_size=128, weight_decay=0.0001) train(args) |
改造箇所は、以下の様です。
1)オリジナルのCSVデータを読み込ませるための修正
27行目(修正):from mnist_data import data_iterator_mnist を以下に修正
import nnabla.utils.data_iterator as d
164行目(修正):data = data_iterator_mnist (args.batch_size, True) を以下に修正
data = d.data_iterator_csv_dataset (“.\\face_train.csv”, args.batch_size, shuffle=True, normalize=False)
*face_train.csv がオリジナルのCSVデータです。
*normalize=Falseは、本体のプログラムで正規化しているのでダブらないようにキャンセルしています。
2)ネットワーク定義の修正(Generator, Discriminator)
出力を1,28,28 → 3,64,64 にし、Generator, Discriminator ともレイヤーを1段追加して、少しいじっています。
各レイヤーの最大画像枚数を設定する maxh は 256 → 1024 へ4倍にしています。
ほぼ、論文のスペックに近い形です。
3)モニターの修正
162行目(追加):生成画像を頻度高くチェックしたいので、interval=100 にしています(デフォルトはinterval=1000)。 num_images=16(生成画像の大きさ:16だと4×4のタイル状に表示)としていますが、デフォルトが16なので、なくても良いです。
データセットの準備
元画像のデータは、前々回のブログで使ったものを流用します。
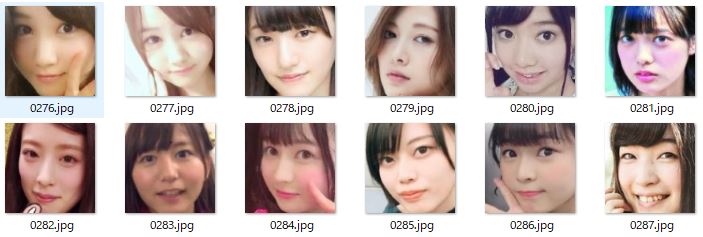
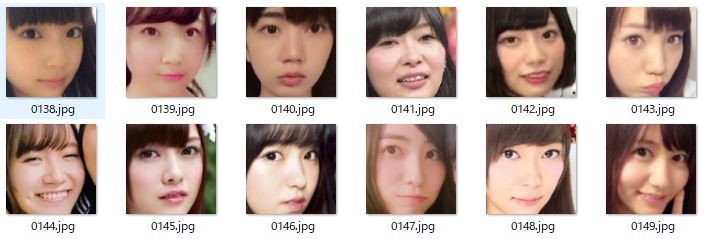
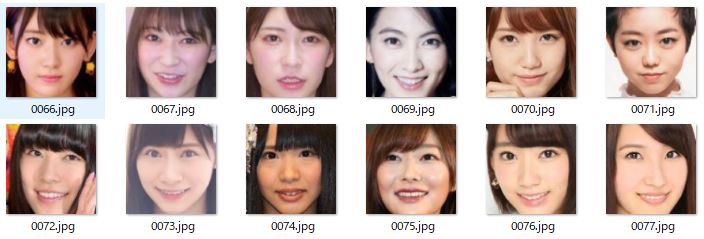
顔の向きによって、右向き2,400枚、左向き2,400枚、正面2,400枚、合計7,200枚あります。元画像は大体100×100ピクセル以上あるので、今回の仕様は思い切ってカラー64×64にしようと思います。
例によって、XnConvert でリサイズしてから、Neural Network Console の + Create Dataset 機能で、データセットを作成します。
NNablaのDCGANは、評価ファイルを使いませんので、学習ファイル100%で作ればOKです。また、学習ファイルのラベルは全部「0」でOKです。
学習実行
適当なフォルダーに、必要なプログラムとデータを格納します。

face_dcgan.py がプログラム本体、フォルダー「0」とface_train.csv がデータセット、args.py が関連プログラム( NNabla-examples-master の MNIST-Collection の中にあります)。
そして、ターミナルでこのフォルダーに移動し、> Python face_dcgan.py -c cudnn でプログラムを実行します(GPUで動かすことを強くお勧めします)。
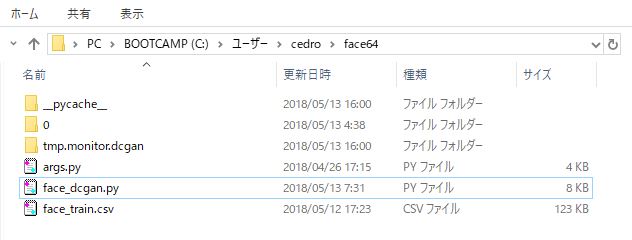
プログラムを実行すると、「tmp.monitor.dcgan」というフォルダーが作成され、この中に、生成画像、学習によって得られた重みパラメーターファイル、その他各種データが自動的に保存されます。
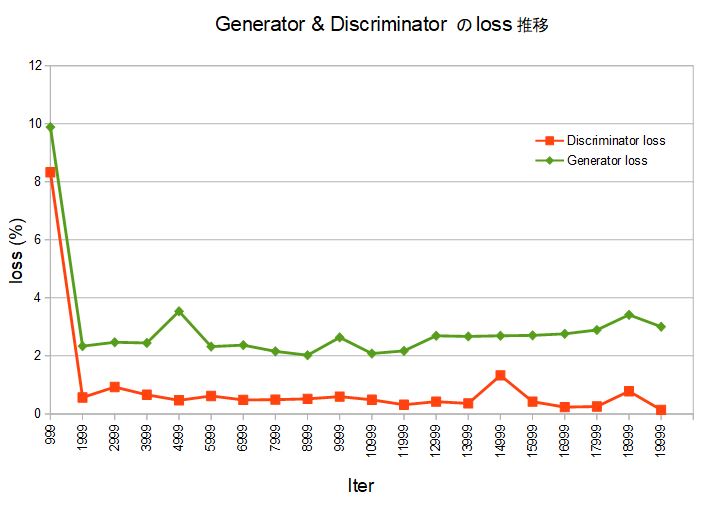
バッチ64、20,000ステップ(20,0000/7,200÷64=178エポック)で学習を開始します。このグラフは、「tmp.monitor.dcgan」に保存された txtデータを元にCalcで作成したものです。
Generator、Discriminatorとも、2,000ステップ(1,999 Iter)あたりからloss が落ち着いて来て、画像らしきものが現れ始めます。
一貫して、Generator loss が Discriminator loss より高いですが、それでも4%を超えることは少なく、画像の作りこみが進んで行きます。
マシンは、NEXTGEAR-NOTE i5550( Core i7、メモリ16GB、GTX-1060)で、学習時間は42分でした。
生成した画像はこんな感じ。
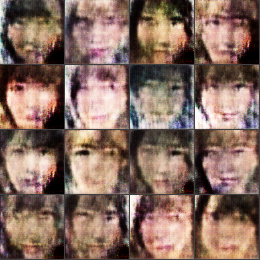
2,000ステップ
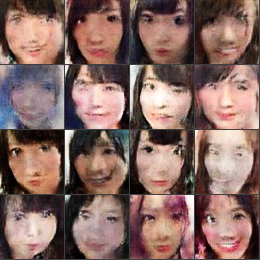
10,000ステップ
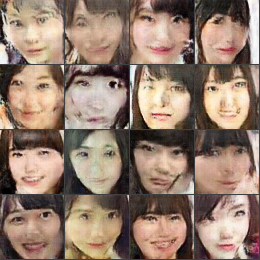
20,000ステップ
データ数が7,200個と少な目なので完成度はあまり高くありませんが、このあたりまでは簡単に行けます。
顔画像生成器を作成します。
2018.1.28のブログ「SONY Neural Network Libraries で、学習済みモデルの推論実行をやってみる」でご紹介した、推論実行プログラムを使います。
|
1 2 3 4 5 6 7 8 9 10 11 12 13 14 15 16 17 18 19 20 21 22 23 24 25 26 27 28 29 30 31 32 33 34 35 36 37 38 39 40 41 42 43 44 45 46 47 48 49 50 51 52 53 54 55 56 57 58 59 60 61 62 63 64 65 66 67 68 69 70 71 72 73 74 75 |
from __future__ import absolute_import from six.moves import range import numpy as np import nnabla as nn import nnabla.logger as logger import nnabla.functions as F import nnabla.parametric_functions as PF import nnabla.solvers as S import nnabla.utils.save as save from args import get_args import os def generator(z, maxh=1024, test=False, output_hidden=False): """ Building generator network which takes (B, Z, 1, 1) inputs and generates (B, 3, 64, 64) outputs. """ # Define shortcut functions def bn(x): # Batch normalization return PF.batch_normalization(x, batch_stat=not test) def upsample2(x, c): # Twise upsampling with deconvolution. return PF.deconvolution(x, c, kernel=(4, 4), pad=(1, 1), stride=(2, 2), with_bias=False) assert maxh / 16 > 0 #with nn.parameter_scope("gen"): # (Z, 1, 1) --> (1024, 4, 4) with nn.parameter_scope("deconv1"): d1 = F.elu(bn(PF.deconvolution(z, maxh, (4, 4), with_bias=False))) # (1024, 4, 4) --> (512, 8, 8) with nn.parameter_scope("deconv2"): d2 = F.elu(bn(upsample2(d1, maxh / 2))) # (512, 8, 8) --> (256, 16, 16) with nn.parameter_scope("deconv3"): d3 = F.elu(bn(upsample2(d2, maxh / 4))) # (256, 16, 16) --> (128, 32, 32) with nn.parameter_scope("deconv4"): d4 = F.elu(bn(upsample2(d3, maxh / 8))) # (128, 32, 32) --> (64, 64, 64) with nn.parameter_scope("deconv5"): d5 = F.elu(bn(upsample2(d4, maxh / 16))) # (64, 64, 64) --> (3, 64, 64) with nn.parameter_scope("conv6"): x = F.tanh(PF.convolution(d5, 3, (3, 3), pad=(1, 1))) return x # Fake path nn.clear_parameters() z = nn.Variable((64, 100, 1, 1)) fake = generator(z) y = fake # 学習済みパラメーターの読み込み nn.parameter.load_parameters(".\\generator_param_019999.h5") # Create monitor. import nnabla.monitor as M monitor = M.Monitor("c:\\Users\\cedro\\dcgan_replay") monitor_fake = M.MonitorImageTile( "Fake images", monitor, interval=1, num_images=16, normalize_method=lambda x: x + 1 / 2.) # Training loop. for i in range(40): z.d = np.random.randn(*z.shape) y.forward() monitor_fake.add(i, fake) |
ネットワーク定義の部分は、先程と同様に修正します。
61行目(修正要);読み込む重みパラメーターファイルを指定する箇所。
65行目(修正要):モニターデータをどのフォルダーに出力するかの部分は、絶対パスになっていますので、各人の環境によって修正をお願いします。
適当なフォルダーに、プログラムとデータを格納します。

dcgan_replay.py が画像生成(推論実行)プログラム、generator_param_019999.h5 が学習によって得られた重みパラメーターファイル(学習時にフォルダーに自動的に保存されます)、args.py が関連プログラム(先程と同じ)。
重みパラメーターファイルがあるおかげで、もはや画像データは不要になりました。
後は、ターミナルでこのフォルダーに移動し、> Python dcgan_replay.py でプログラムを実行すればOKです。こちらは、推論を実行するだけですので、GPU無しで問題ありません。
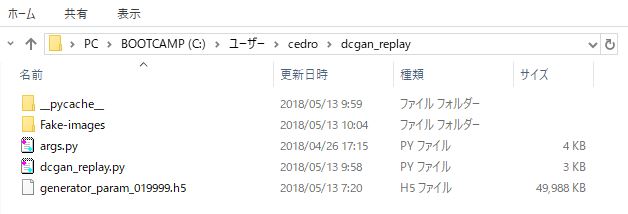
プログラムを実行すると、「Fake-images」フォルダーが作成され、この中に4×4の顔画像が40枚生成されます。1枚の画像生成には8秒程度かかります( MacbookAirの場合 )。
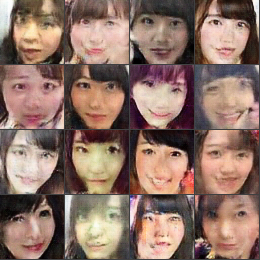
生成した画像の1枚がこれです。さあ、これで顔画像を直ぐ生成する顔画像生成器が出来ました。
「後編」では、この顔画像生成器を使って、顔画像と入力ベクトルの関係を考察し、入力ベクトルを操作して、画像のカテゴリーをコントロールしてみたいと思います。
では、また。










コメントを残す