1.はじめに
今回ご紹介するのは、顔のボヤけたモノクロ写真をシャープなカラー写真に変換するGFPGANという技術です。
*この論文は、2021.11に提出されました。
2.GFPGANとは?
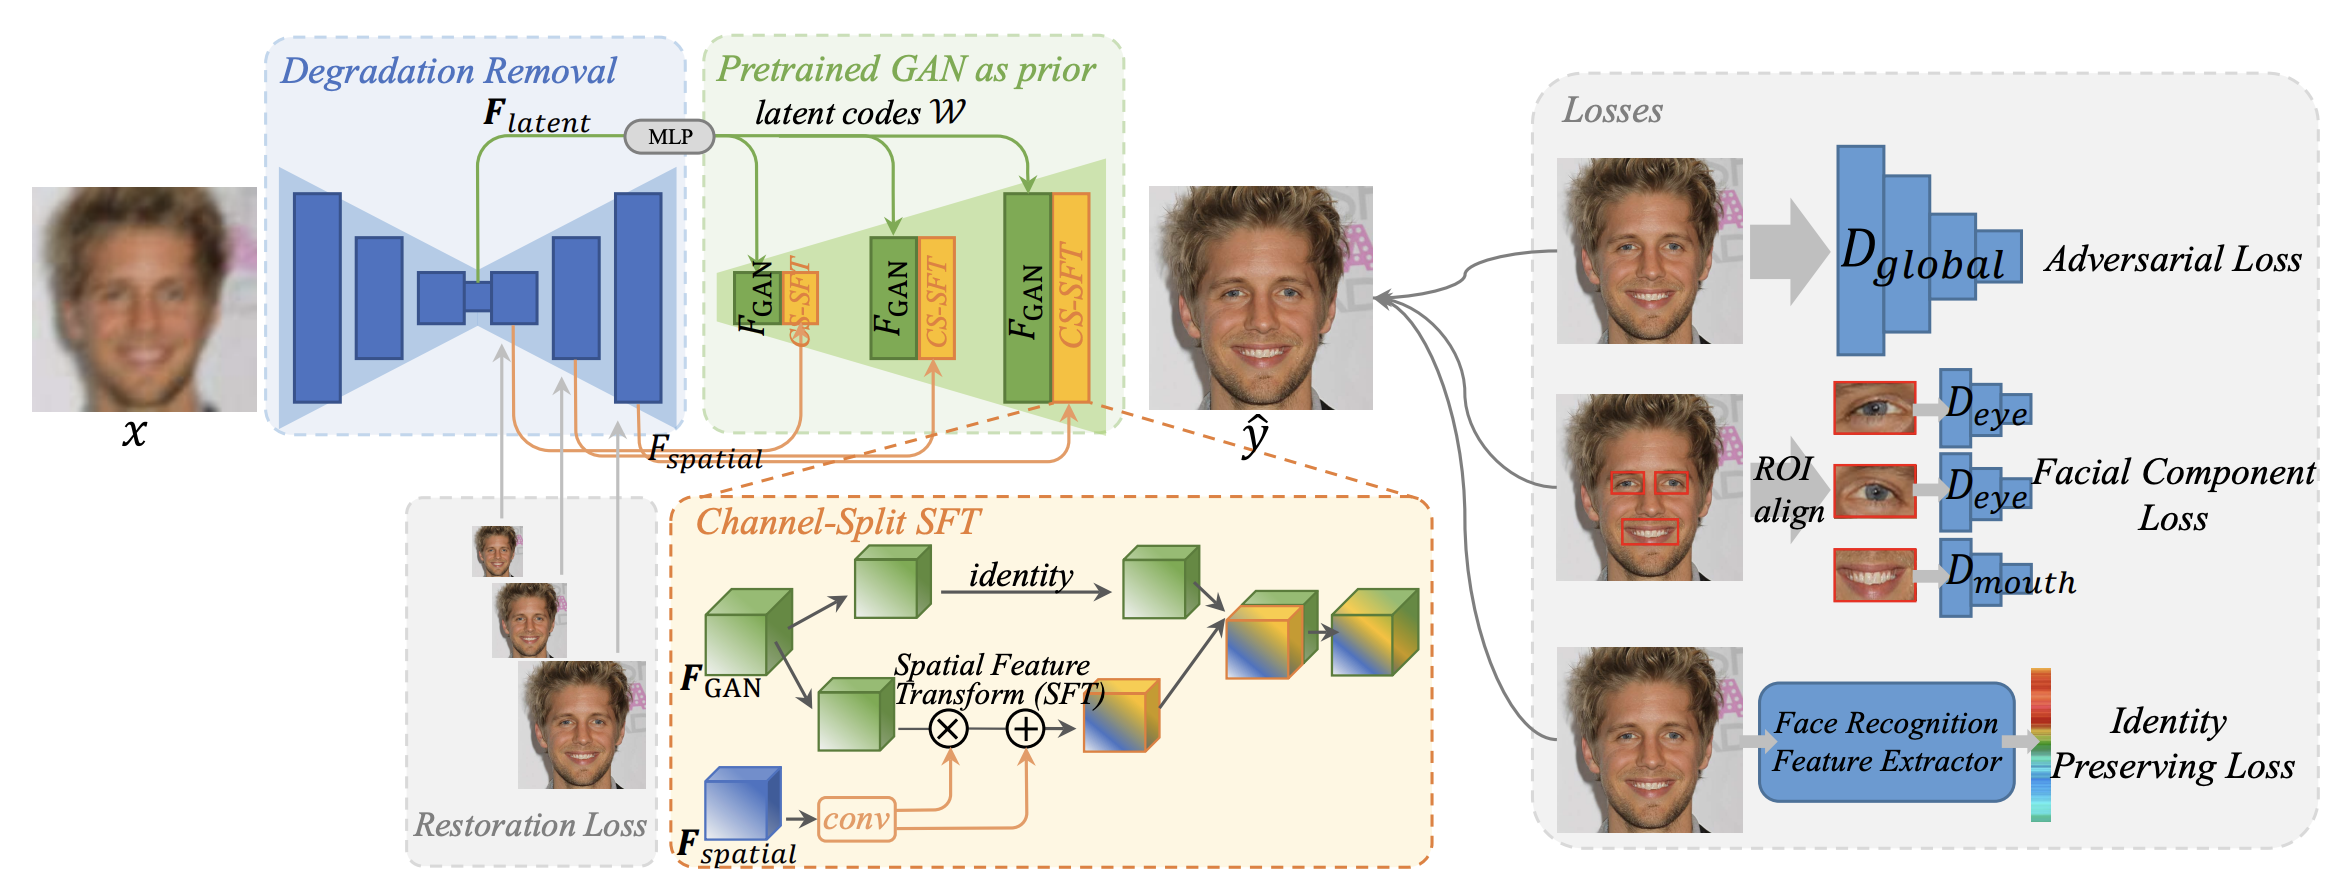
下記が GFPGAN(Generative Facial Prior GAN)の概要図です。基本的には、従来からあるStyleGANを使ってボヤけた顔を復元する手法ですが、いくつか改良ポイントがあります。
1つ目は、GANの前段に Degradation Removal(劣化除去モジュール)を設けて、latent codes W(潜在的コードマッピング)と Channel-Split SFT(分割空間機能変換)で接続したことです。このときGANへ伝達するのが、従来の低解像度の情報のみではなく、低解像度〜高解像度の情報であるため、学習後は1回のフォワードパスで結果を得ることが出来ます。
2つ目は、ロスとして Facial Component Loss( 顔を構成するパーツ毎のロス)と Identity Preserving Loss(顔のアイデンティティを保持するためのロス)を追加したことです。
また、これらと合わせてReal-ESRGANを使った一般的な画像復元を行い画像全体をシャープにしています。
3.コード
コードはGoogle Colabで動かす形にしてGithubに上げてありますので、それに沿って説明して行きます。自分で動かしてみたい方は、この「リンク」をクリックし表示されたノートブックの先頭にある「Colab on Web」ボタンをクリックすると動かせます。
まず、セットアップを行います。カラー化については、GFPGANにもカラー化バージョンはありますが、今回は個人的にカラー化性能の高いと思うDeOldifyを使用しますので、GFPGAN と DeOldify の両方をセットアップします。
|
1 2 3 4 5 6 7 8 9 10 11 12 13 14 15 16 17 18 19 20 21 22 23 24 25 26 27 28 29 30 31 32 33 34 35 36 37 38 39 40 41 42 43 44 45 46 47 48 49 50 51 52 53 54 55 56 57 58 |
#@title #**setup** # --- GFPGAN setup --- # Clone GFPGAN %cd /content !rm -rf GFPGAN !git clone https://github.com/cedro3/GFPGAN.git %cd GFPGAN # install library !pip install basicsr !pip install facexlib !pip install -r requirements.txt !python setup.py develop !pip install realesrgan # Download the pre-trained model !wget https://github.com/TencentARC/GFPGAN/releases/download/v1.3.0/GFPGANv1.3.pth -P experiments/pretrained_models # add function from function import display_pic, reset_folder, comp_display # --- DeOldify setup --- # Clone DeOldify %cd /content !rm -rf DeOldify !git clone https://github.com/jantic/DeOldify.git %cd DeOldify #NOTE: This must be the first call in order to work properly! from deoldify import device from deoldify.device_id import DeviceId #choices: CPU, GPU0...GPU7 device.set(device=DeviceId.GPU0) import torch if not torch.cuda.is_available(): print('GPU not available.') # install library ! pip install -r requirements-colab.txt # import library import fastai from deoldify.visualize import * import warnings warnings.filterwarnings("ignore", category=UserWarning, message=".*?Your .*? set is empty.*?") # download models ! mkdir 'models' ! wget https://data.deepai.org/deoldify/ColorizeArtistic_gen.pth -O ./models/ColorizeArtistic_gen.pth # download watermark ! wget https://media.githubusercontent.com/media/jantic/DeOldify/master/resource_images/watermark.png -O ./resource_images/watermark.png # load model colorizer = get_image_colorizer(artistic=True) |
今回は、100年くらい前の古いモノクロ写真をシャープなカラー写真に変換してみます。最初に、GFPGAN/images フォルダに格納されているサンプル画像を見てみましょう。なお、自分の画像を使用したい場合は、このフォルダにその画像(jpg)を事前にアップロードしておいて下さい。
|
1 2 |
#@title #**display sample picture** display_pic('/content/GFPGAN/images') |
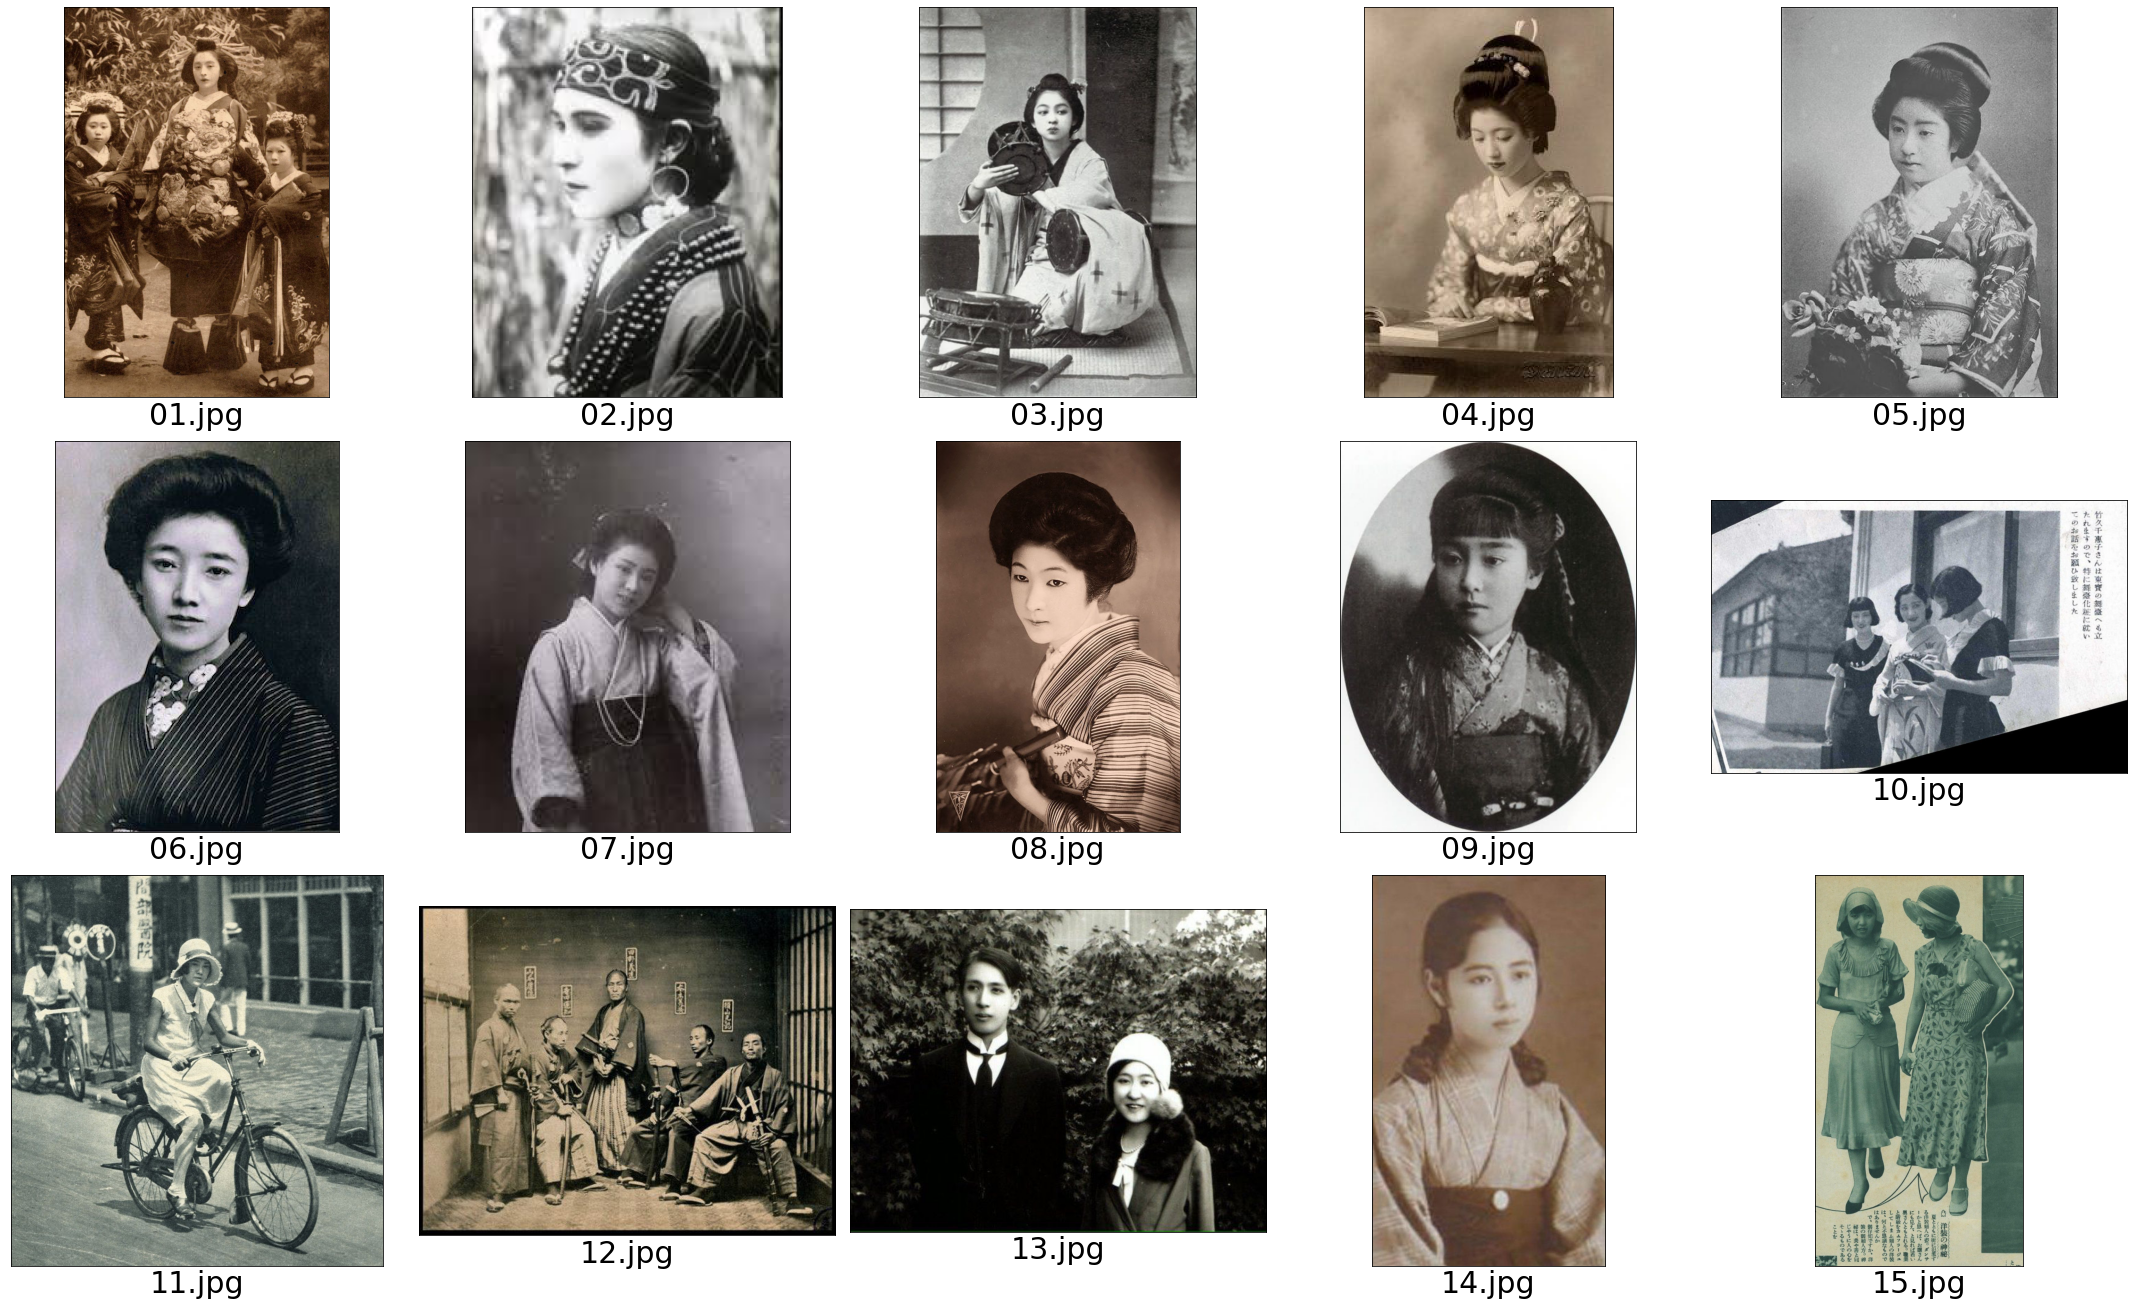
表示されている画像の中から1つ選んで、picture : にファイル名を記入しGFPGANを実行します。ここでは picture : 09.jpg を設定して実行します。
|
1 2 3 4 5 6 7 8 9 10 11 12 13 14 |
#@title #**GFPGAN** %cd /content/GFPGAN !rm -rf results picture = '09.jpg'#@param {type:"string"} input_path = 'images/'+ picture !python inference_gfpgan.py -i $input_path -o results -v 1.3 -s 2 --bg_upsampler realesrgan # display befor & after from IPython.display import clear_output clear_output() img_input = cv2.imread('images/'+picture) img_output = cv2.imread('results/restored_imgs/'+picture) comp_display(img_input, img_output) |
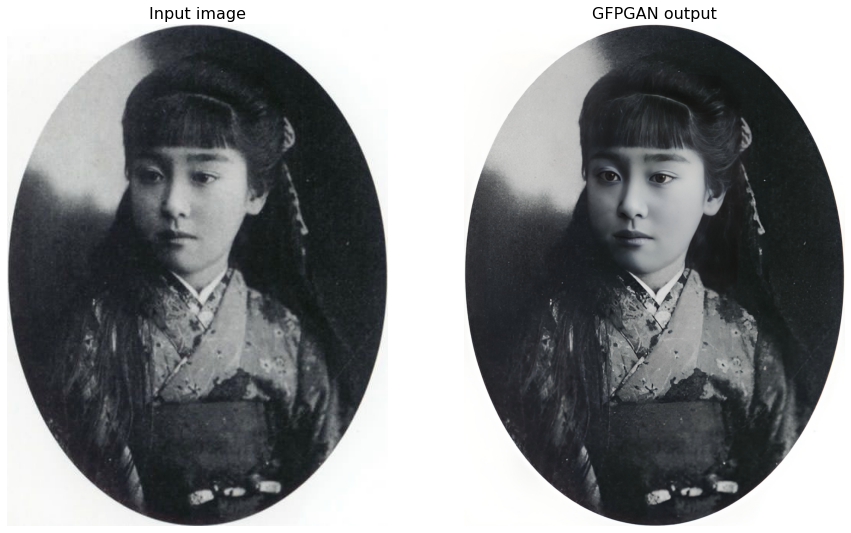
画像全体がクッキリしたことが分かります。続いて、DeOldifyを使ってこの画像をカラー化します。
|
1 2 3 4 5 6 7 8 9 10 11 12 13 14 15 16 17 18 19 20 21 |
#@title #**DeOldify** # copy image %cd /content/DeOldify import shutil pic = '/content/GFPGAN/results/restored_imgs/'+picture dst_pic = '/content/DeOldify/test_images/'+picture shutil.copy(pic, dst_pic) # DeOldify file_path = 'test_images/'+picture render_factor = 35 colorizer.plot_transformed_image(file_path,\ render_factor= render_factor,\ watermarked = False,\ display_render_factor=False,\ compare=True,\ figsize=(15,15)) |
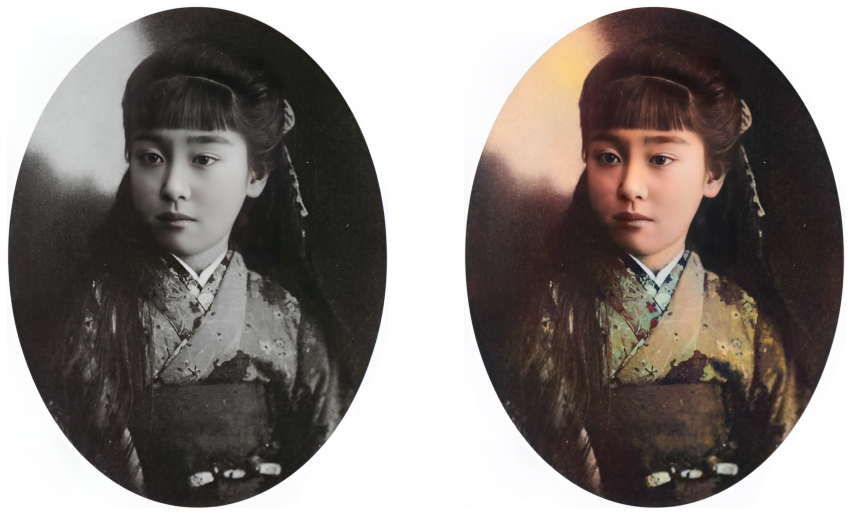
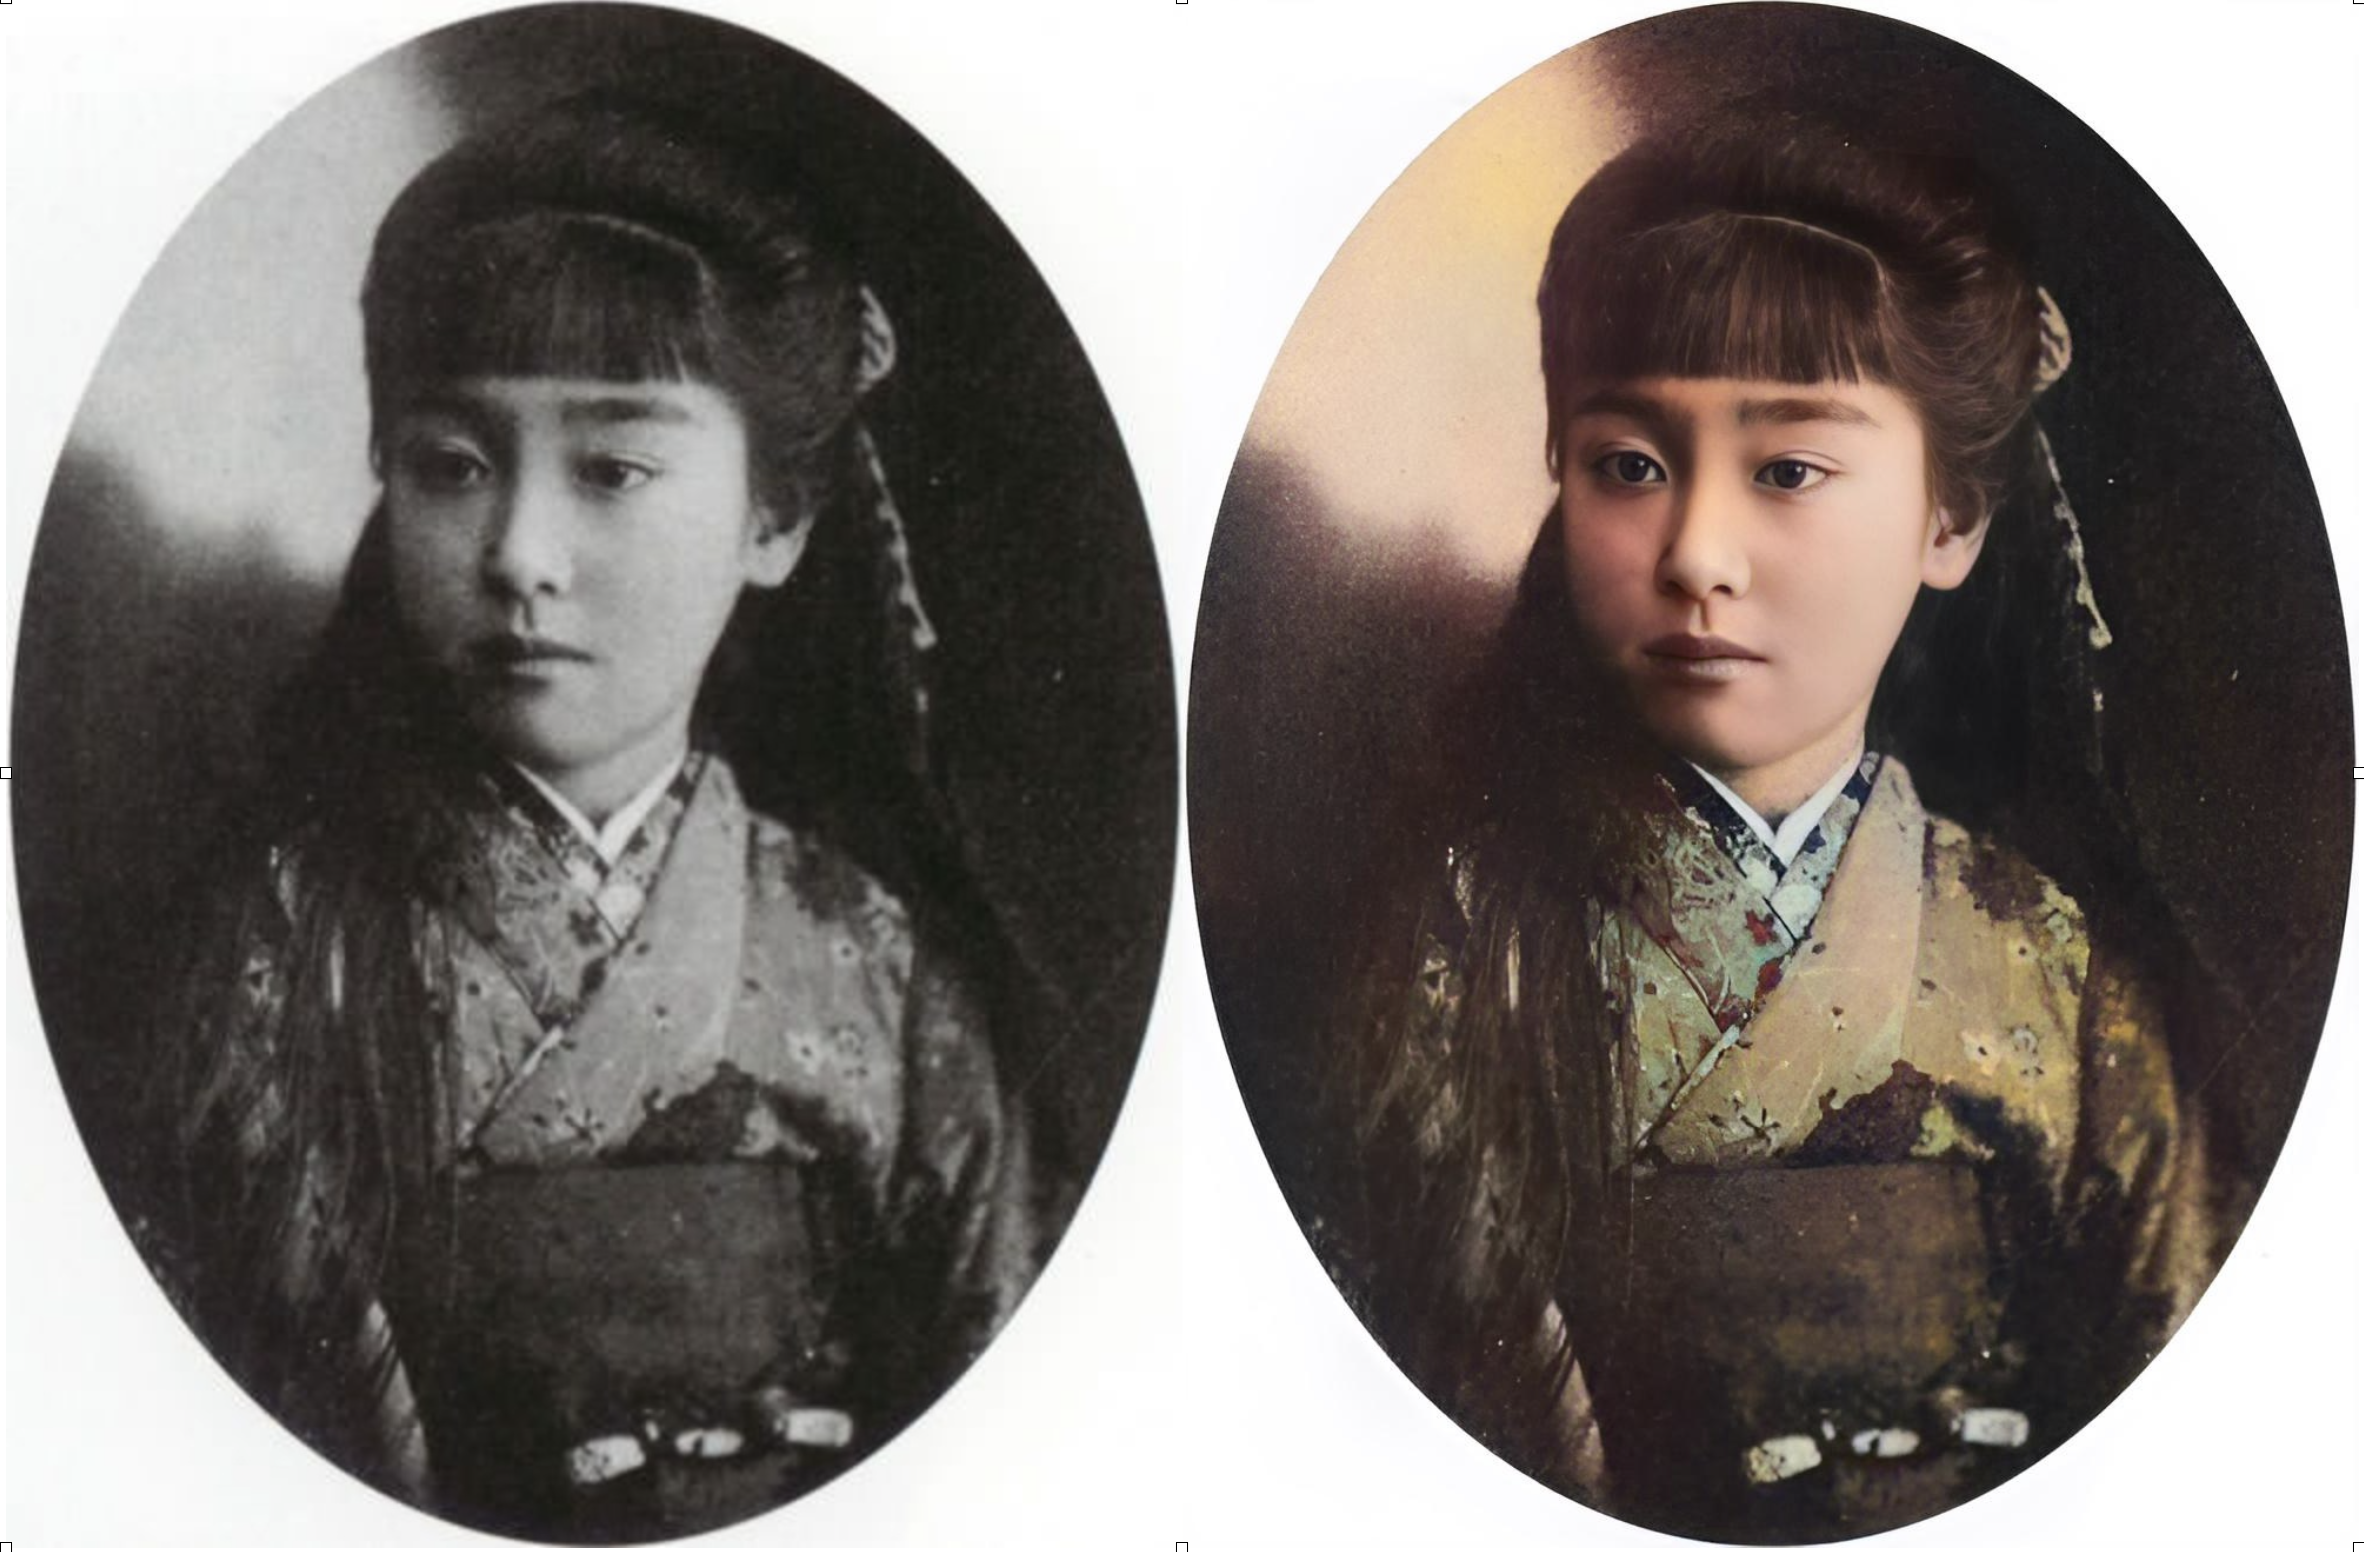
くっきりとしたカラー写真が出来ました。それでは、最初と比べてどの様に変化したのか見てみましょう。表示した画像は自動的にダウンロードされます(必ず Google chromeを使って下さい)。
|
1 2 3 4 5 6 7 8 9 10 11 12 13 14 15 16 17 18 19 20 21 22 23 24 25 |
#@title #**final comparison image** # concatenate pre-conversion and post-conversion images reset_folder('compare_images') mono = cv2.imread('/content/GFPGAN/images/'+picture) tmp = cv2.imread('/content/GFPGAN/results/restored_imgs/'+picture) color = cv2.imread('/content/DeOldify/result_images/'+picture) height, width ,channels =tmp.shape mono = cv2.resize(mono, dsize=(width, height)) color = cv2.resize(color, dsize=(width, height)) if height > width: result = cv2.hconcat([mono, color]) else: result = cv2.vconcat([color, mono]) cv2.imwrite('compare_images/fine'+picture, result) # display from IPython.display import display from IPython.display import Image as show_img display(show_img('compare_images/fine'+picture)) # auto-download from google.colab import files files.download('compare_images/fine'+picture) |

ぼやけたモノクロ写真が、クッキリとしたカラー写真に生まれ変わりました!ちなみに、この方は明治時代のミスコンの石川県代表だった方です。
もう1つやってみましょう。今度は、picture : 10.jpg で実行します。
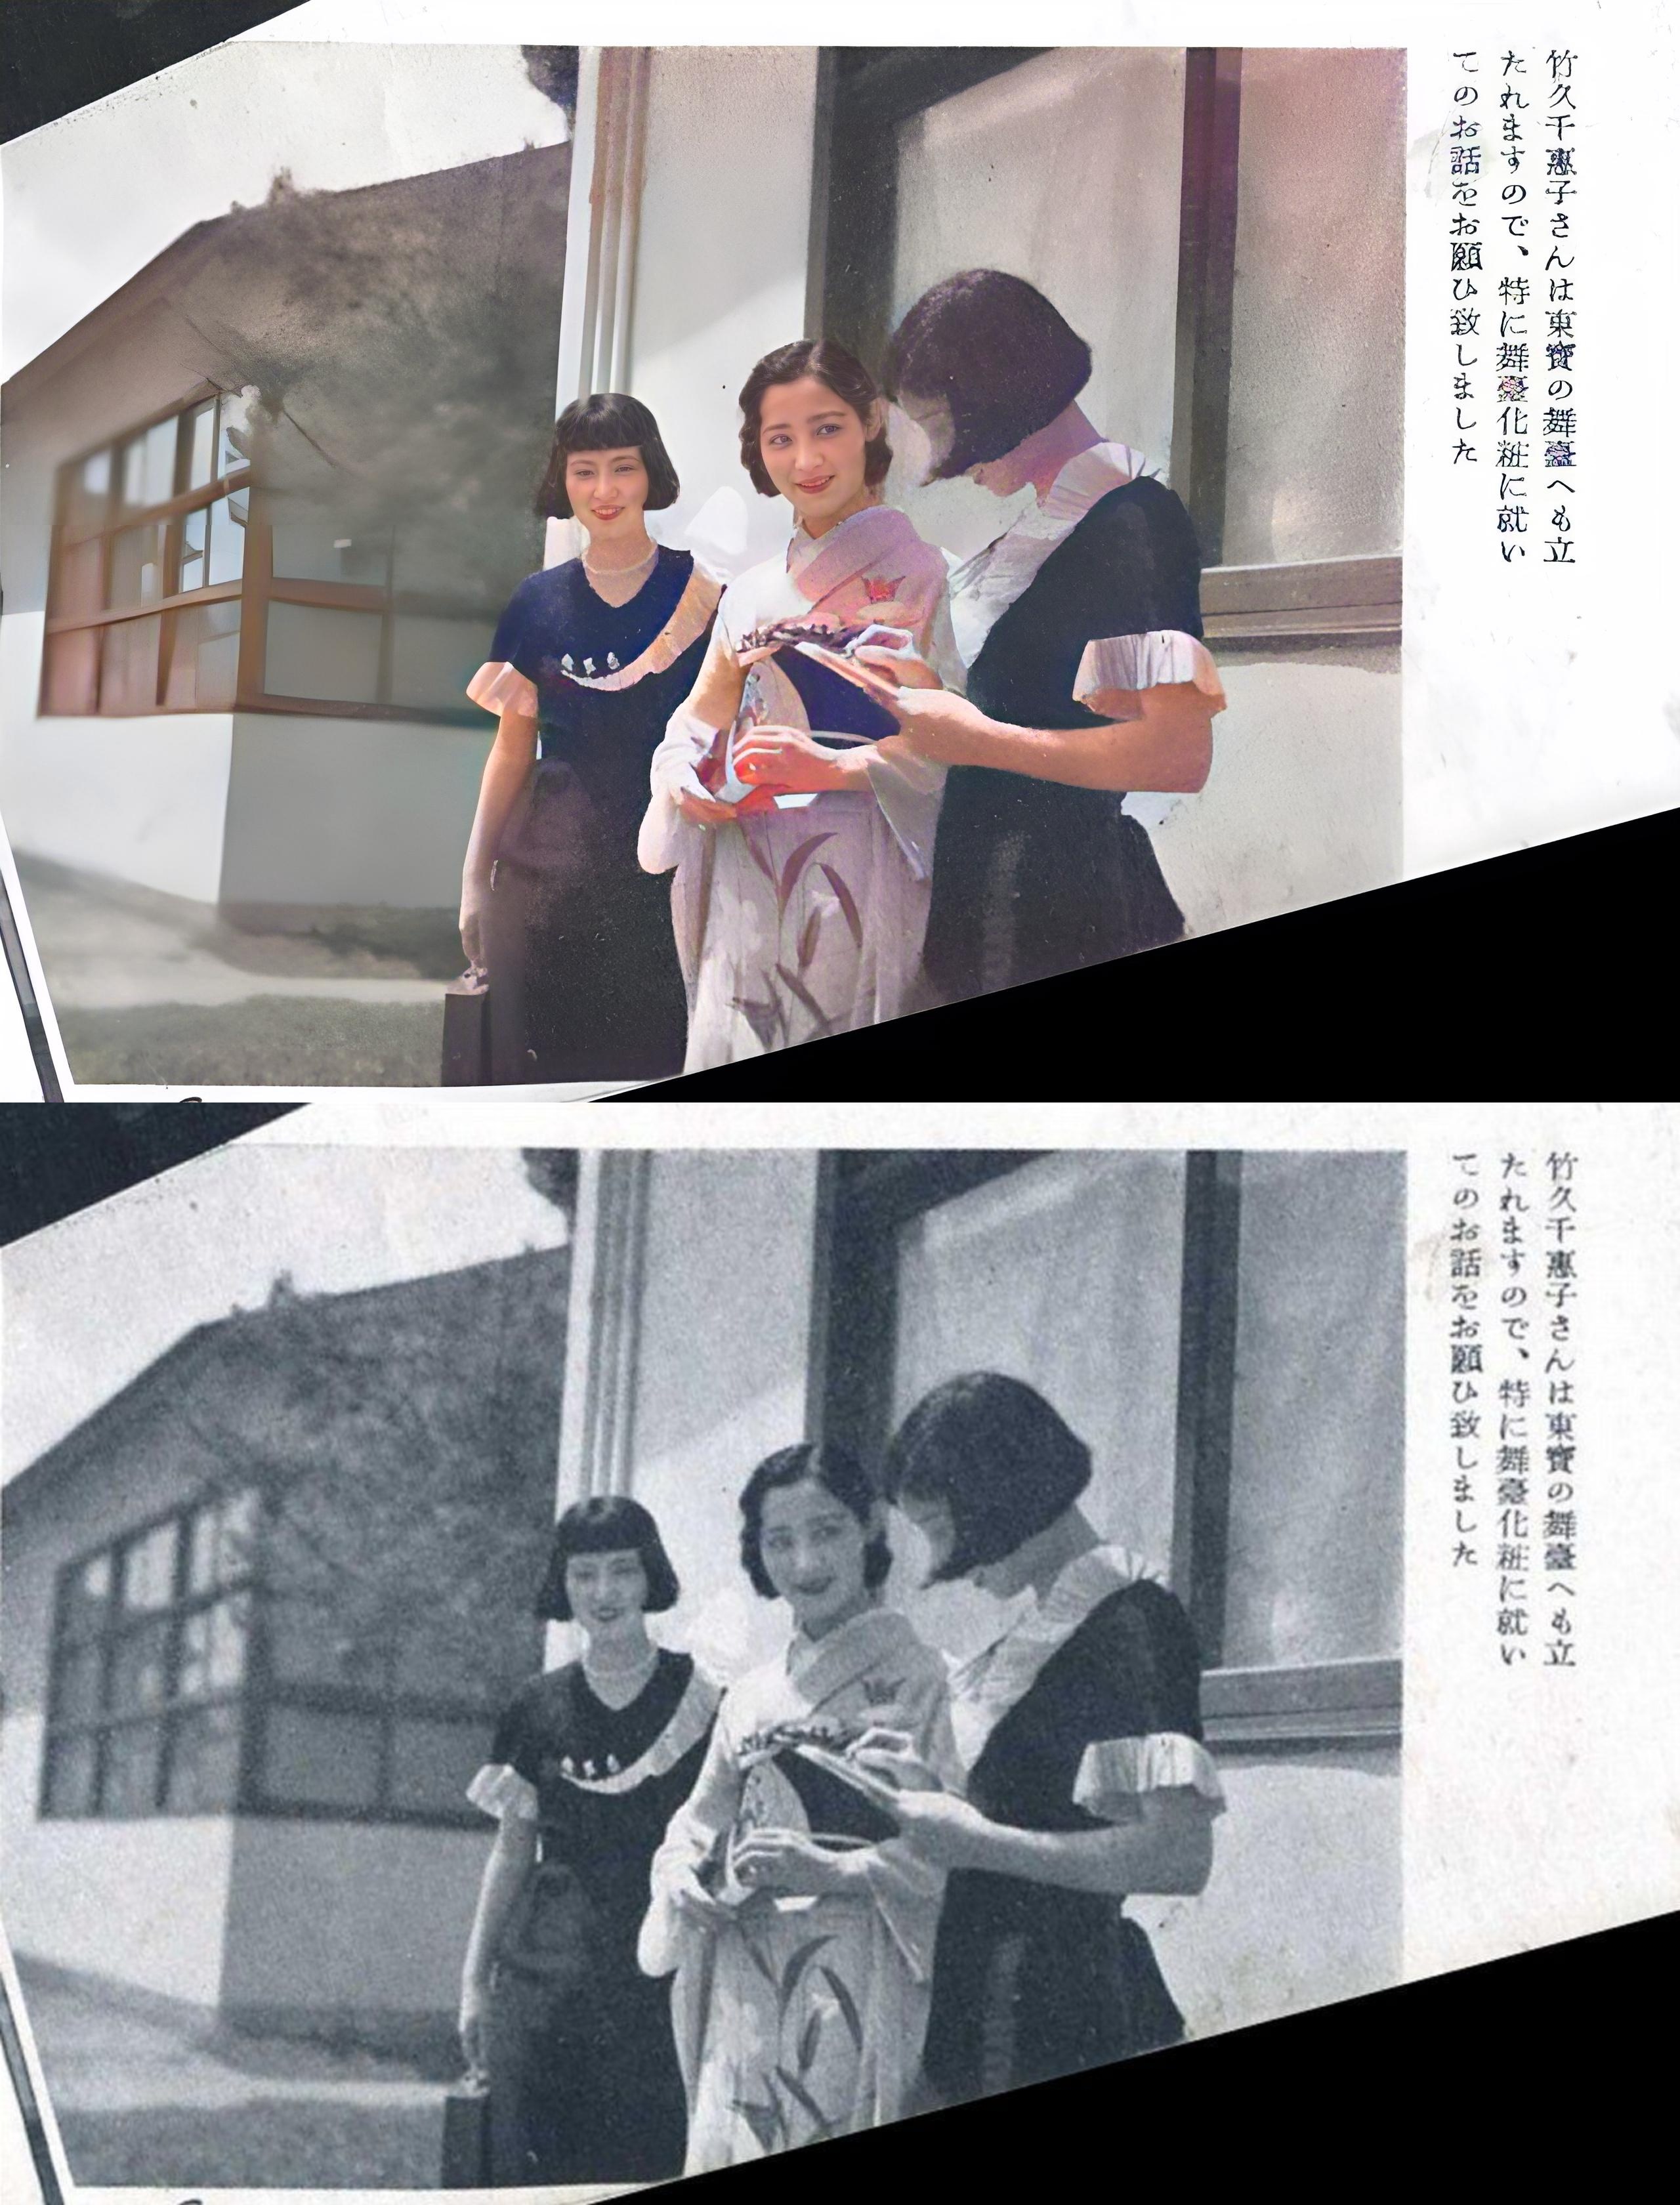
これは、1934年(昭和9年)に発刊された雑誌「資生堂グラフ」に掲載された写真で、若い女性の和装と洋装が混在しており、洋装も興味深いデザインになっているのが時代を感じさせますね。
では、また。
(オリジナルGithub)https://github.com/TencentARC/GFPGAN
コメントを残す